How to sign in, confirm access, review the Overview page and use the Financial Plan, Project Financial Report and Prepayment search pages.
Audience: UNHCR personnel and funded partnersUpdated: 30 September 2026
1
Introduction
Purpose and audience
This guide explains how to enter the PROMS App and use the Overview, Financial Plan, Project Financial Report and Prepayment search pages. It is intended for UNHCR personnel and authorised funded partner users who need to find records, understand page controls, review status information and export or print available results.
The guide focuses on navigation before detailed record processing begins. Actions available to an individual user depend on the active role, security context and current record status.
2
Overview
What the guide covers
Overview page
Confirm your role and security context, apply overview filters, read totals and status counts and open recently modified records.
Financial Plan search
Use cascading filters, configure columns, recognise actions, print one Financial Plan and export the displayed result set.
Project Financial Report search
Find PFRs, review invoice status in Cloud ERP, configure the result table, print a PFR and export results.
Prepayment search
Find prepayments, configure columns, open invoice details and export the displayed result set.
ImportantAlways confirm the Selected Role in the blue bar before taking action. The active role determines the permissions applied by PROMS.
3
Contents
Guide sections
4
Lifecycle
From access to record review and export
AccessSign inUse the route for UNHCR or partners.
→
ContextConfirm roleCheck the selected role and operation access.
→
OverviewReview workloadRead totals, statuses and recent changes.
→
SearchFind recordsApply filters and review results.
→
OutputOpen, print or exportUse only actions available to your role.
The three search pages follow a common pattern: select filters, run Search, configure visible columns, select an available action and navigate or export the results. Once users understand one search page, the controls on the other pages will be familiar.
5
Sign-in to PROMS App
Access routes for UNHCR personnel and funded partners
Sign in as a UNHCR user
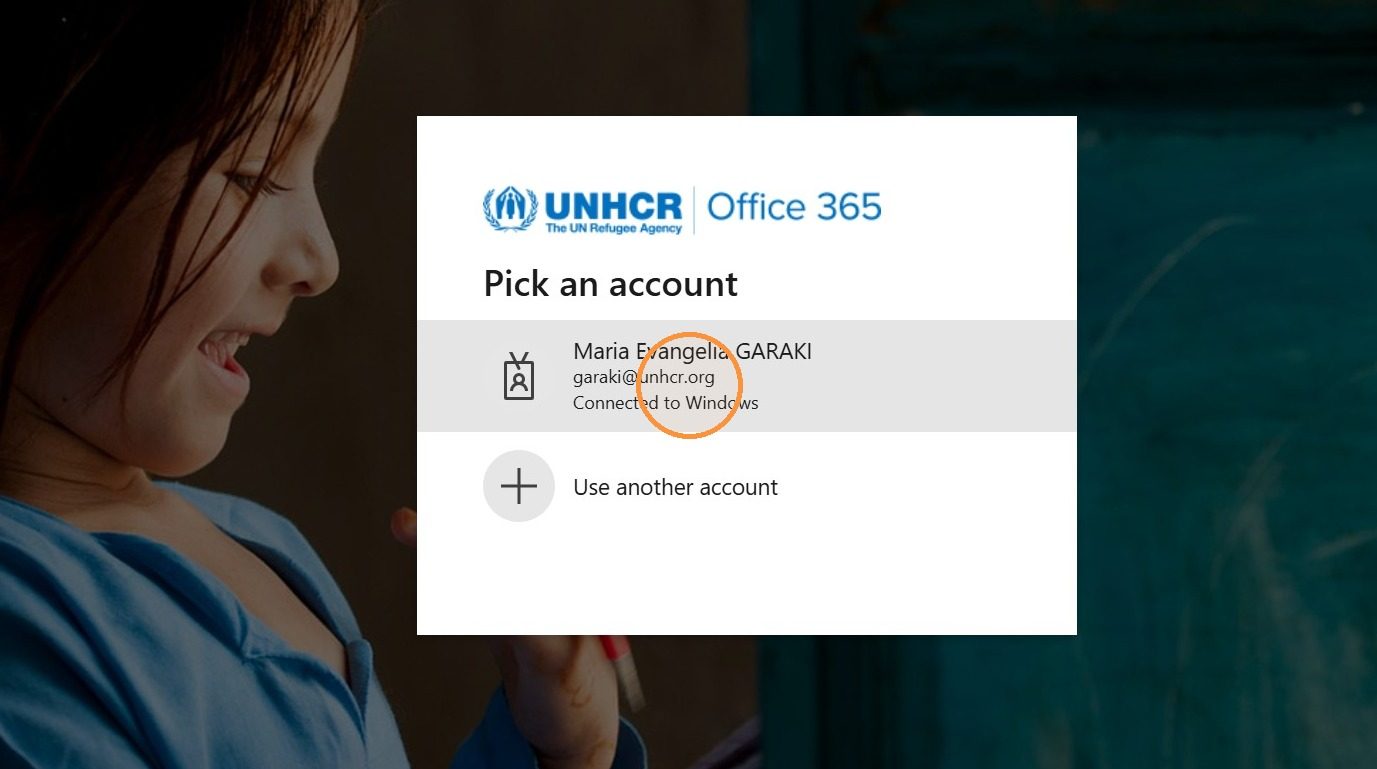
Instruction: Open the PROMS App and select Sign in to your account. Continue with your normal organisational credentials.
Expected result: After successful authentication, PROMS opens the Overview page under your assigned user profile.
Select “Sign in to your account” to enter the PROMS App.
Sign in as a funded partner user
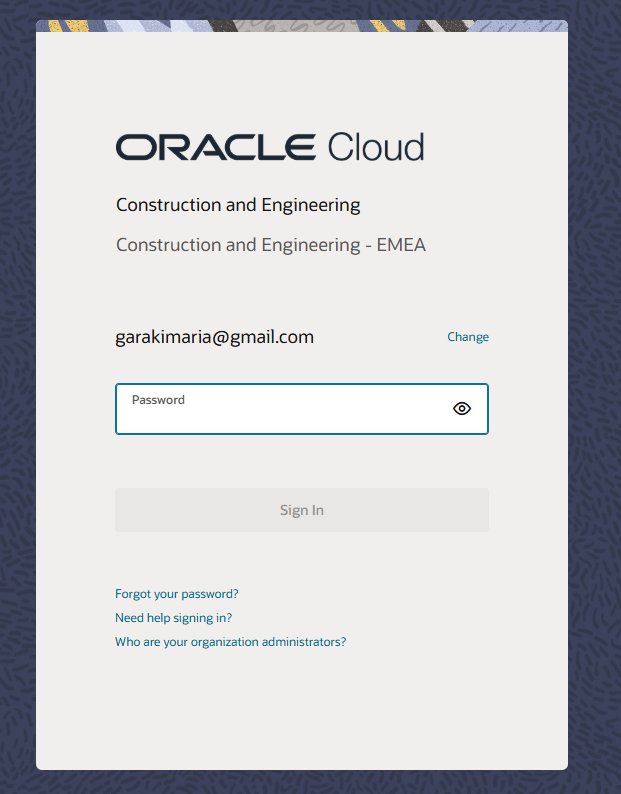
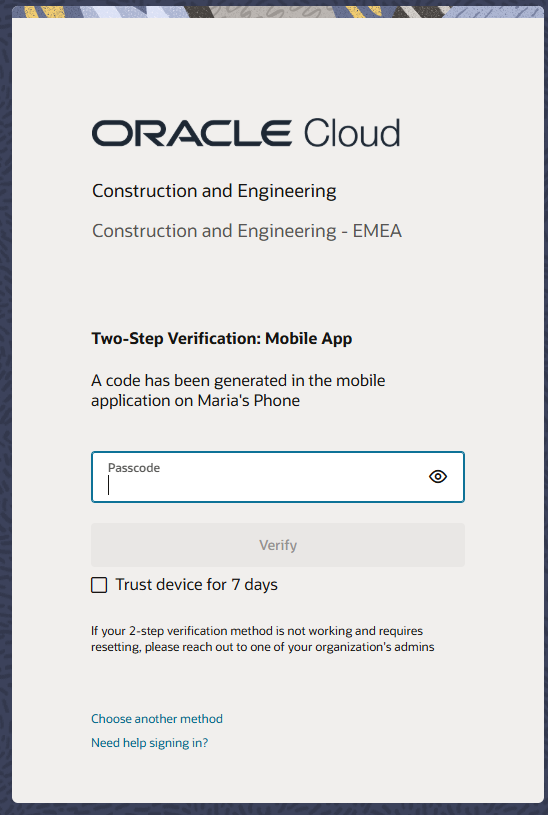
Instruction: Enter the email address and password registered for your Aconex account. When prompted, open Oracle Authenticator on your phone and enter the six-digit code displayed in the application.
Expected result: Once the authentication code is accepted, continue into PROMS. Partner users should see the role HCR PFM PARTNERS.
Enter the email address and password registered for Aconex.
Enter the six-digit code from Oracle Authenticator.
6
Overview page
Profile, filters, totals and direct links to records
Understand the purpose of the Overview page
The Overview page is the landing page for PROMS. It combines profile and access information with filters, summary totals, status breakdowns, notifications and links to records requiring attention. Use it to confirm that you are working in the correct role and operation before opening a search page or record.
Read the blue bar
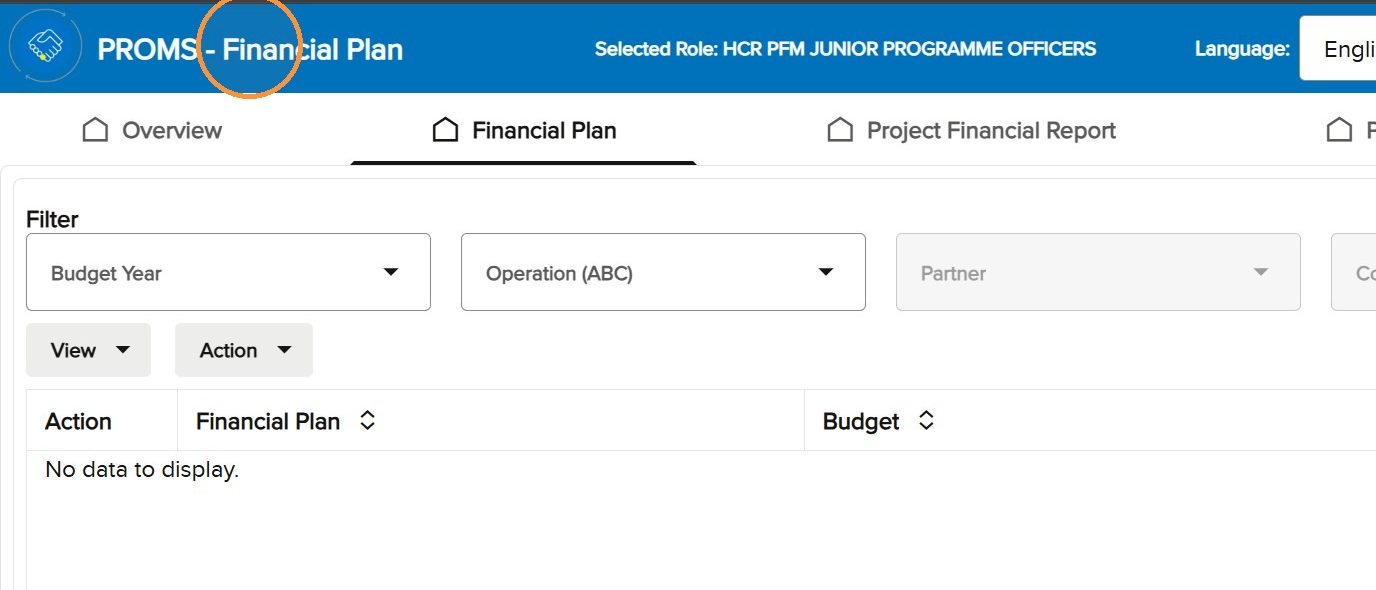
The blue bar remains visible throughout PROMS. The left side displays the application and current page name. The text after “PROMS –” changes when you move between pages. The centre shows the Selected Role. The right side contains the language control and notification bell.
Left side of the blue bar showing the current PROMS page.
Right side of the blue bar showing role, language and notification controls.
Select the language and check notifications
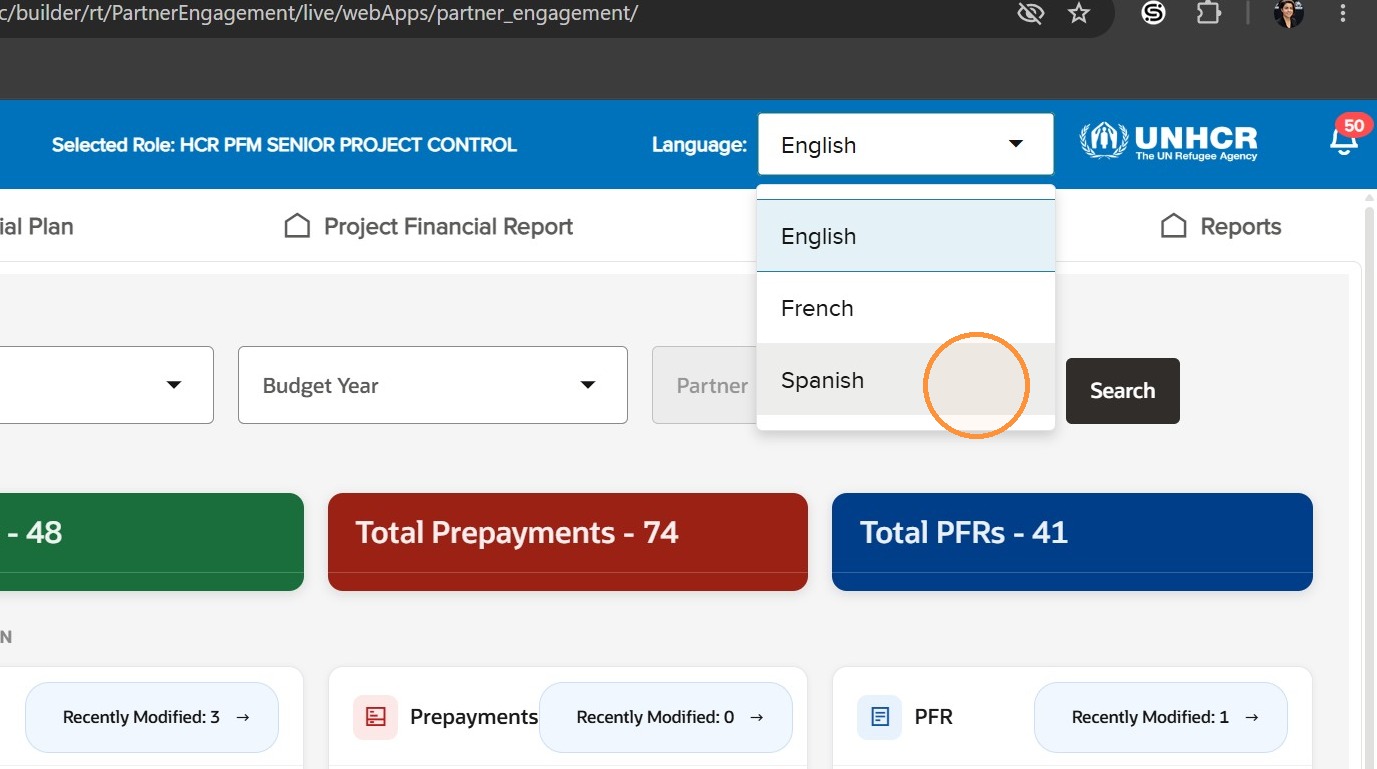
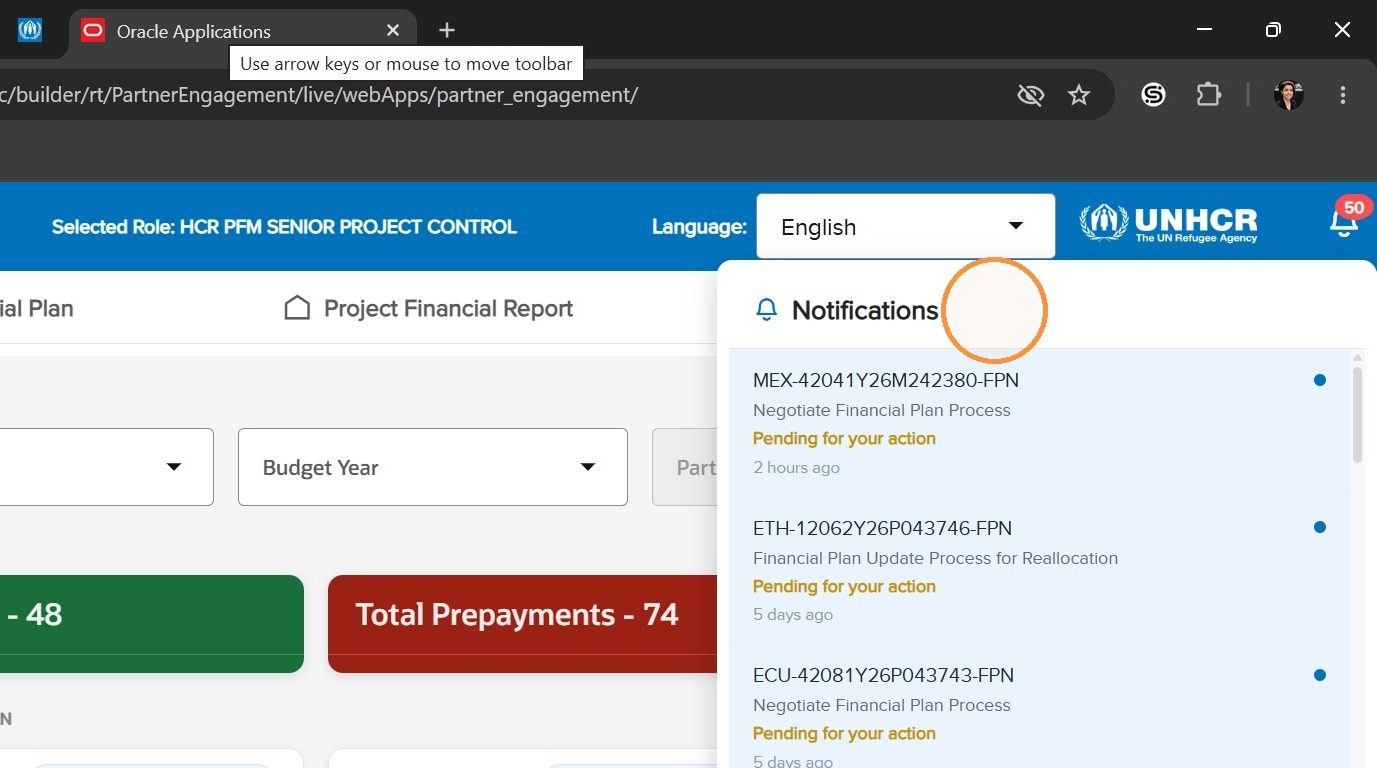
Open the Language dropdown to select English, French or Spanish. Select the notification bell to open the list of actions waiting for you. Review the list before starting work so that pending items are not missed.
Select the preferred interface language from the blue bar.
Open the notification panel to review pending actions.
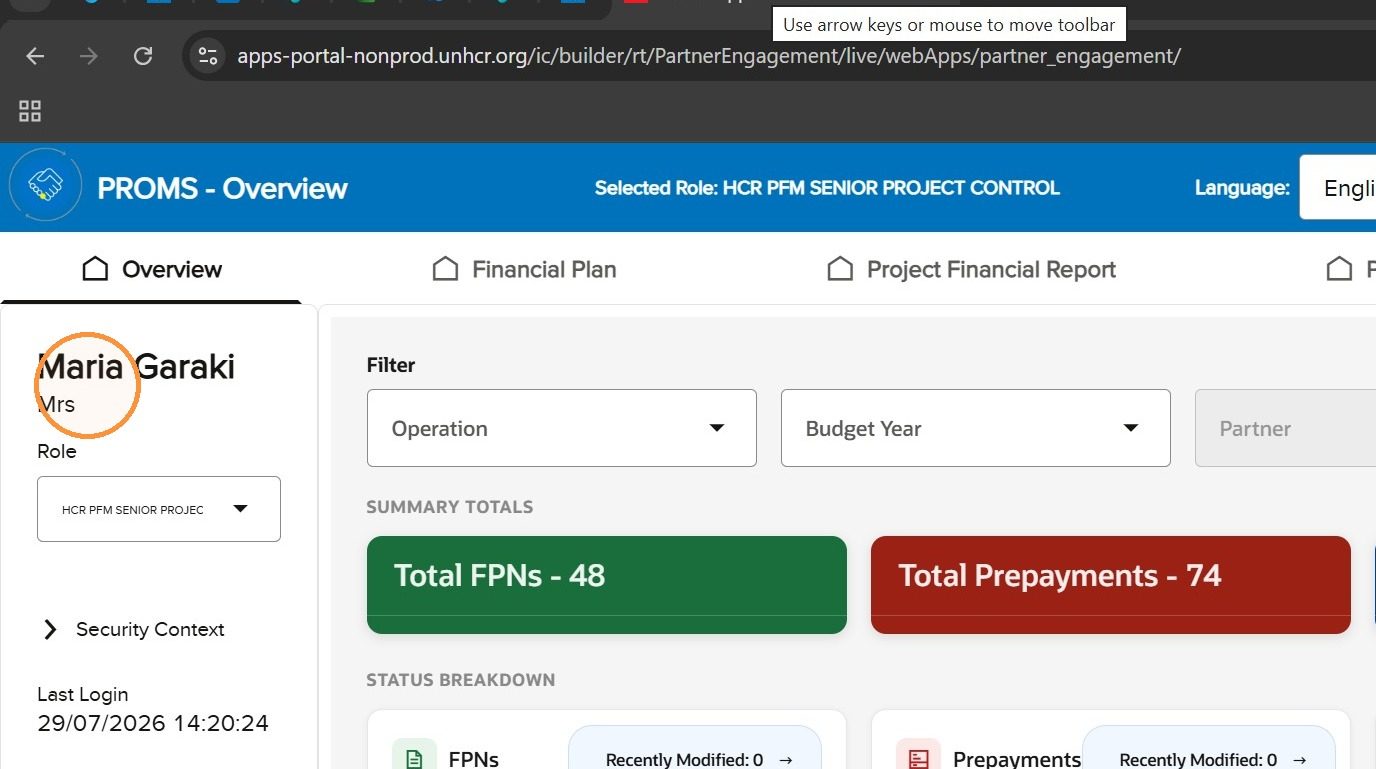
Check your profile name
The upper part of the left panel displays the name of the person currently signed in. Confirm that this is your profile before proceeding.
The profile panel identifies the signed-in user.
Choose the correct role
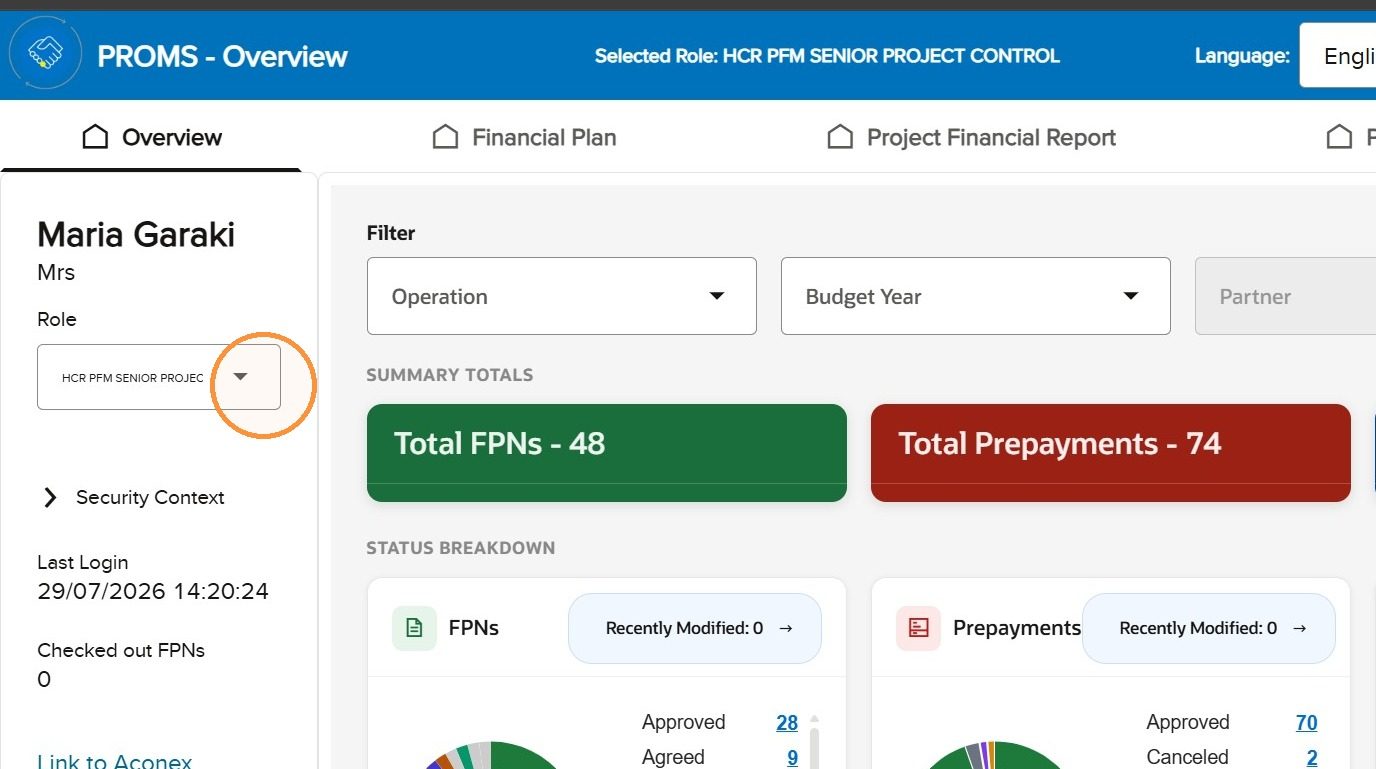
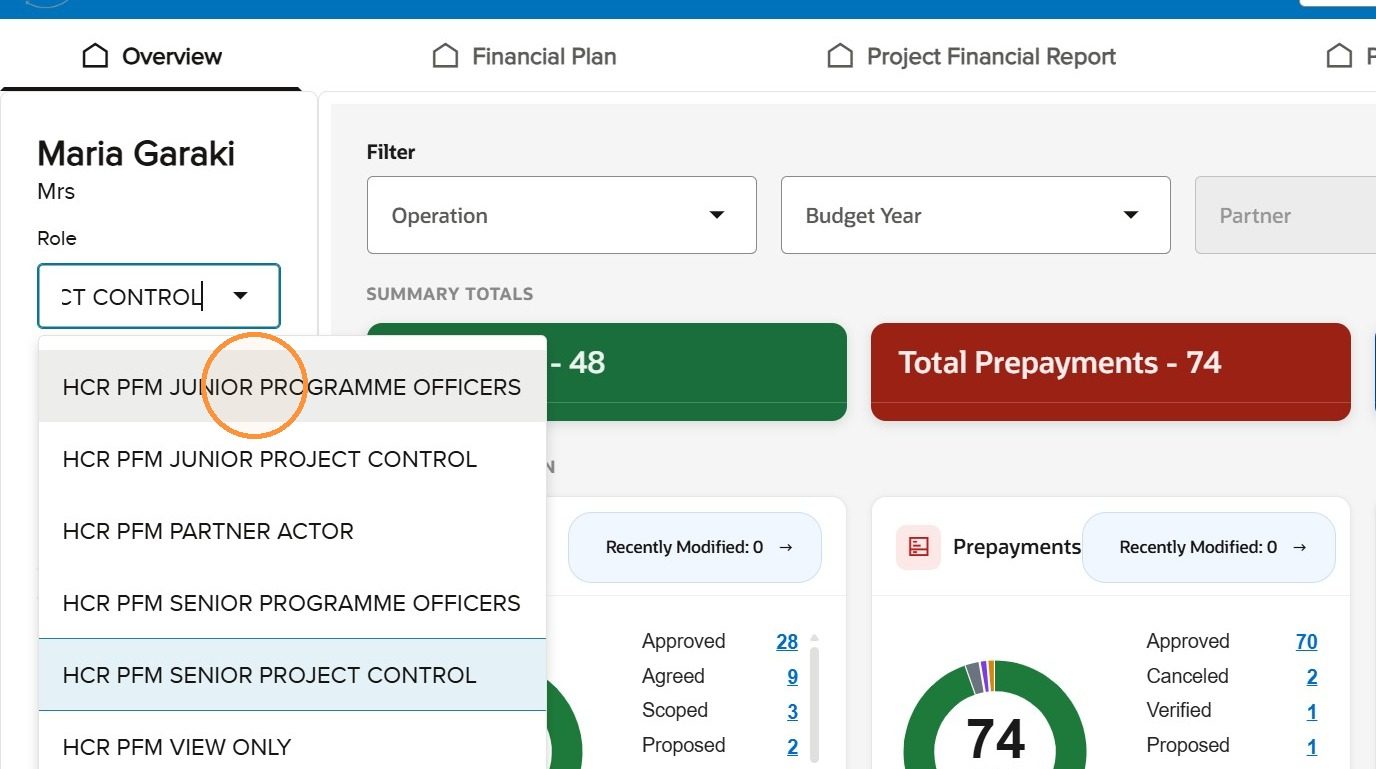
Open the Role dropdown to review the roles assigned to you. Partner users should have the role HCR PFM PARTNERS. UNHCR personnel with more than one role must select the role that corresponds to the work they intend to perform.
Open the Role dropdown from the profile panel.
Review and select from the roles assigned to the account.
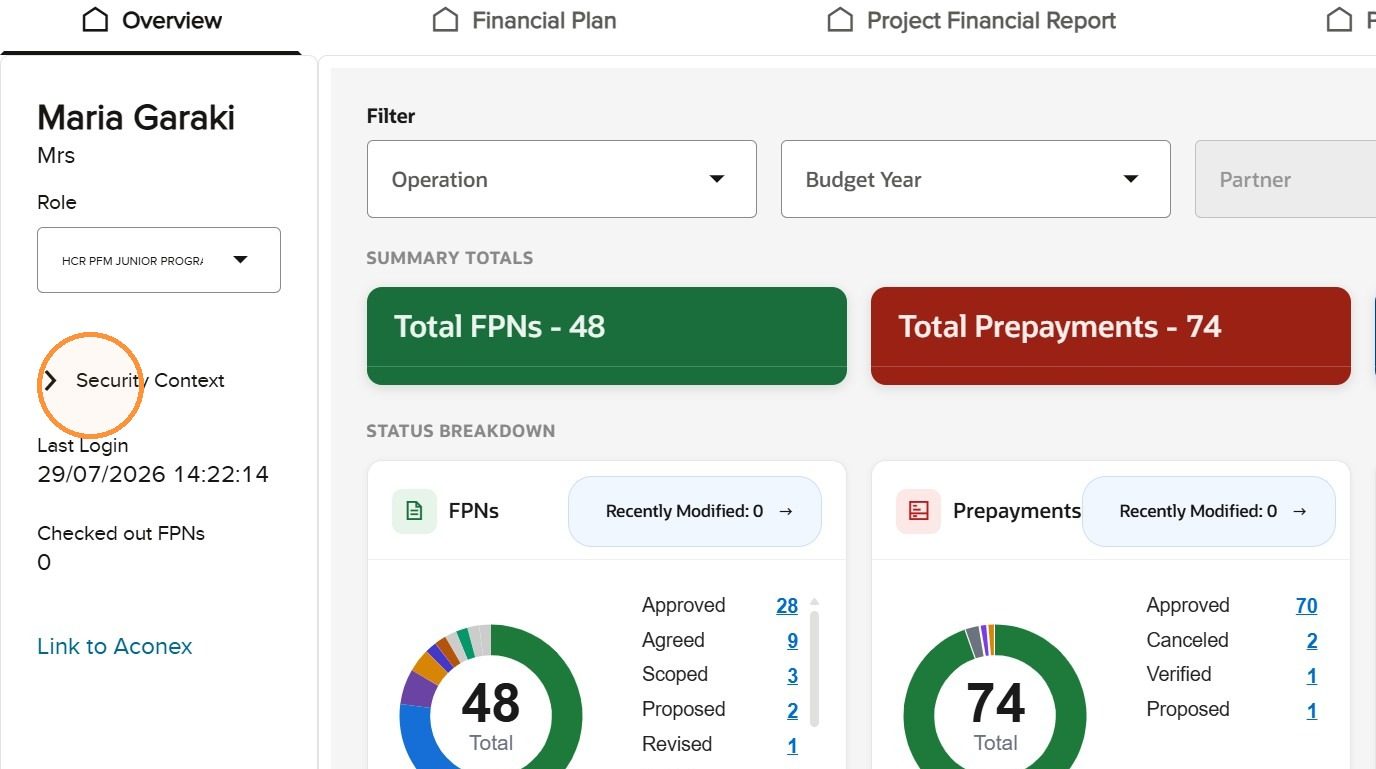
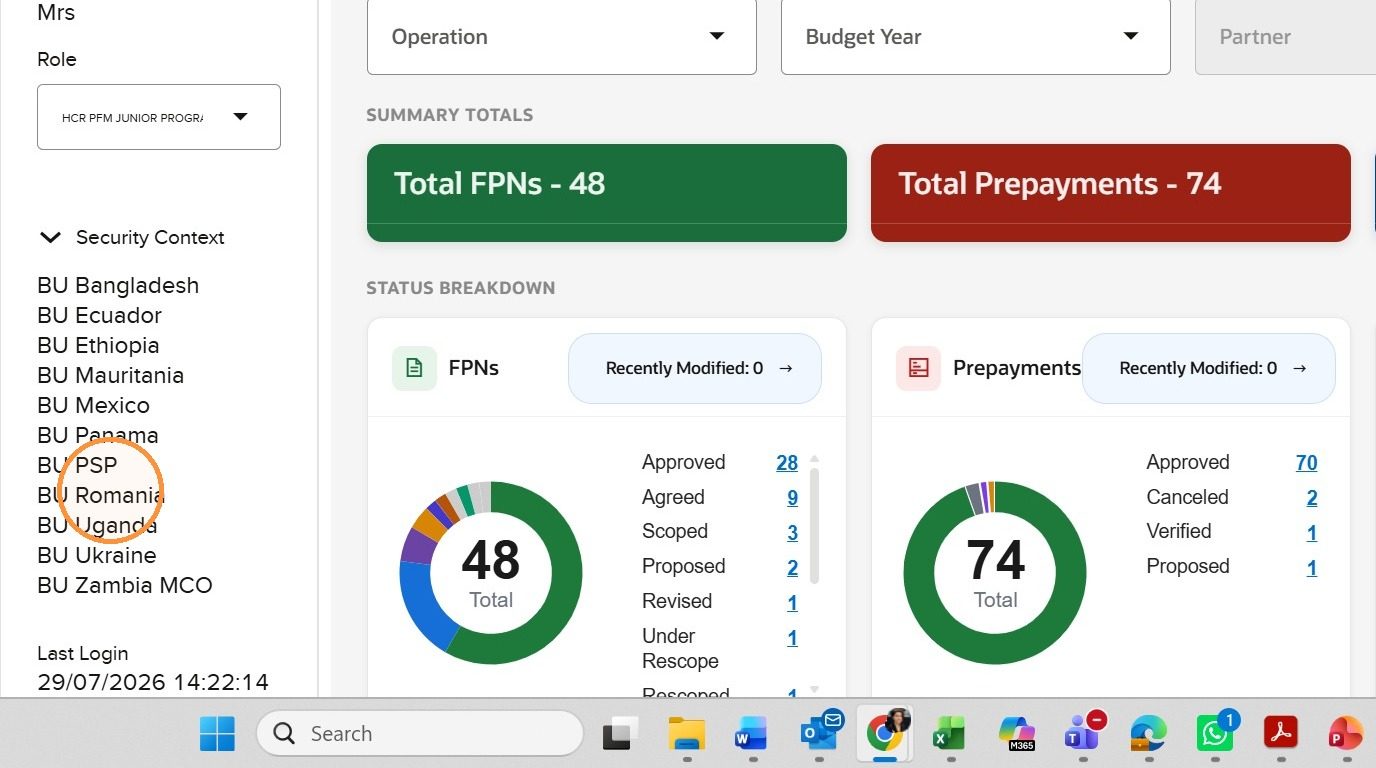
Review the security context
Expand Security Context to see the UNHCR operations or business units available to your account. The security context defines which operational records you can see and work with.
Expand Security Context in the profile panel.
Review the operations available under the active role.
Review account shortcuts
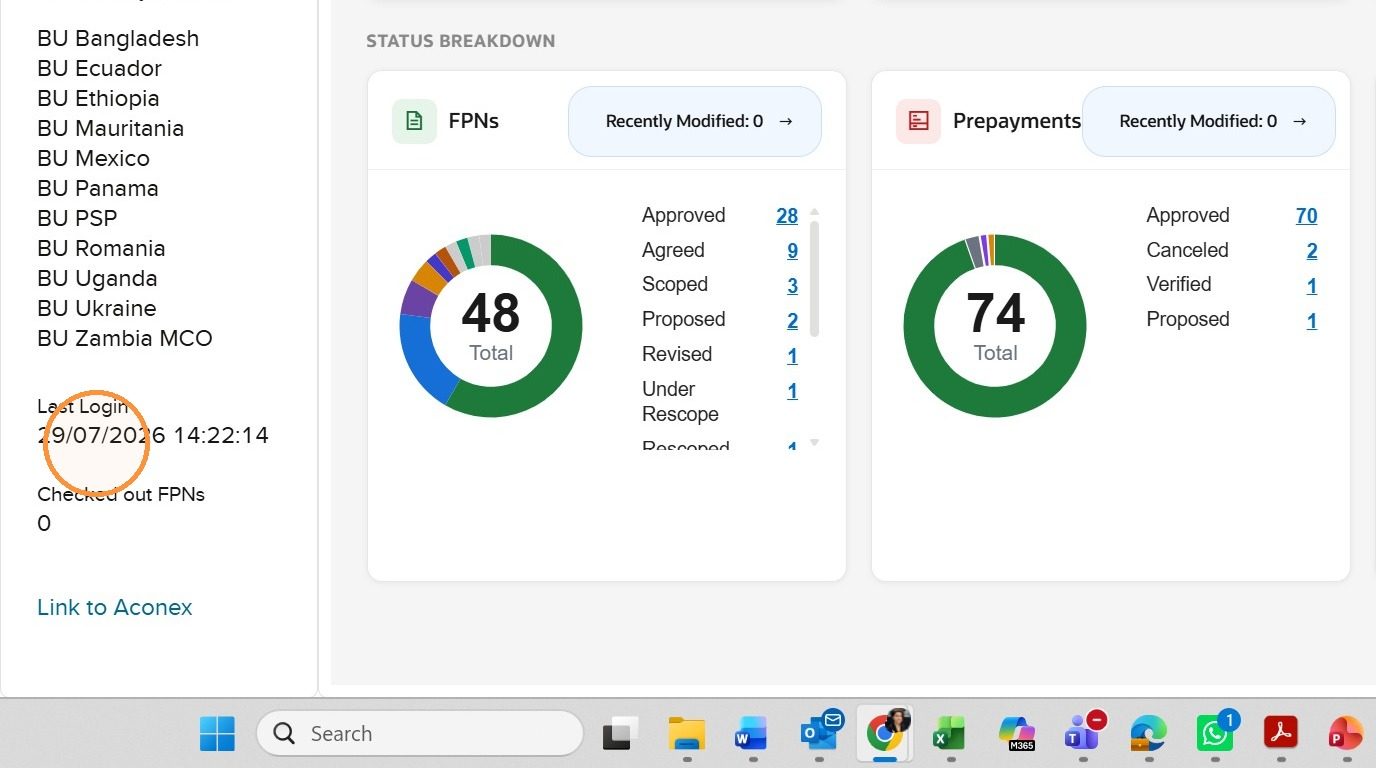
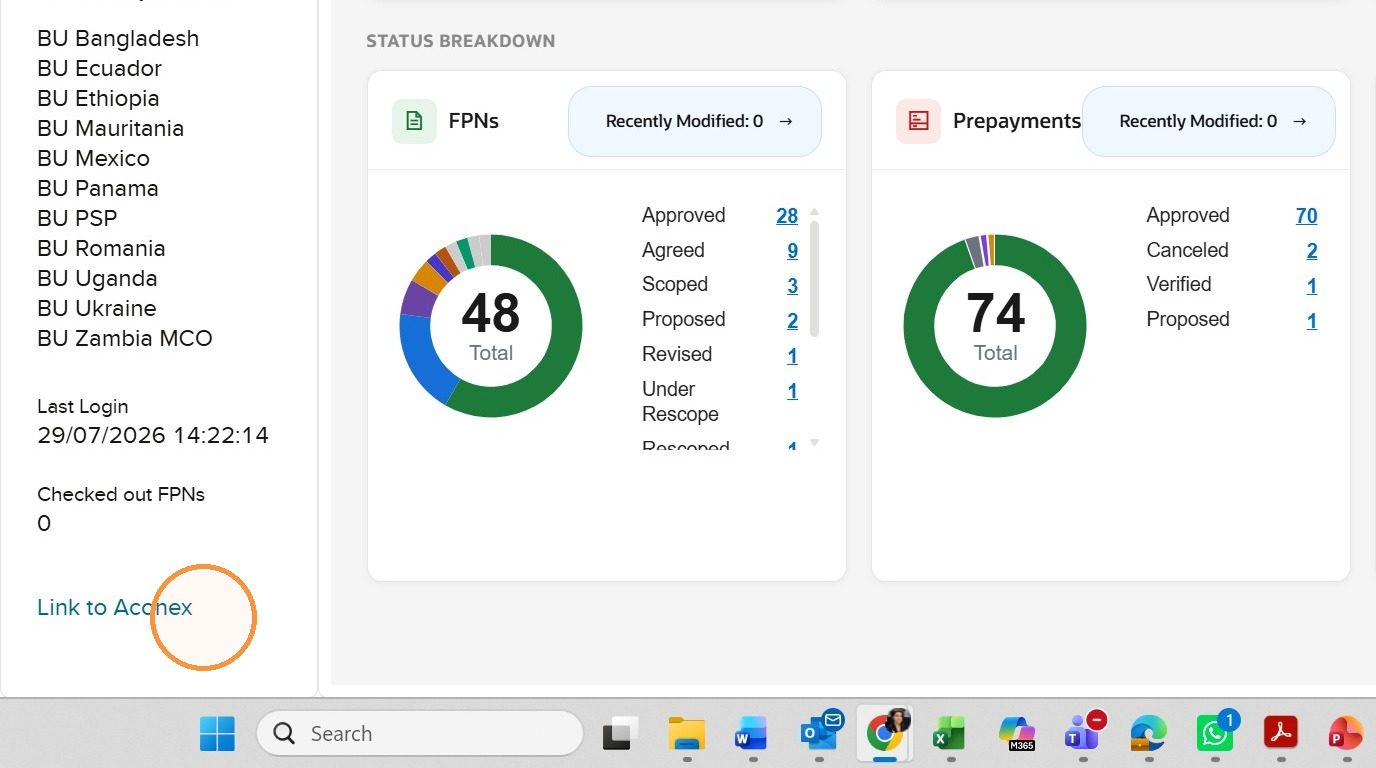
Use Last Login to identify when the previous PROMS session occurred. Checked out FPNs lists Financial Plans checked out during your last session. Link to Aconex opens the Aconex Lobby Account. The Last Login time also provides the reference point used by the Recently Modified counters.
Review the date and time of the previous PROMS login.
Open checked-out FPNs or follow the link to Aconex.
Locate and use the overview filters
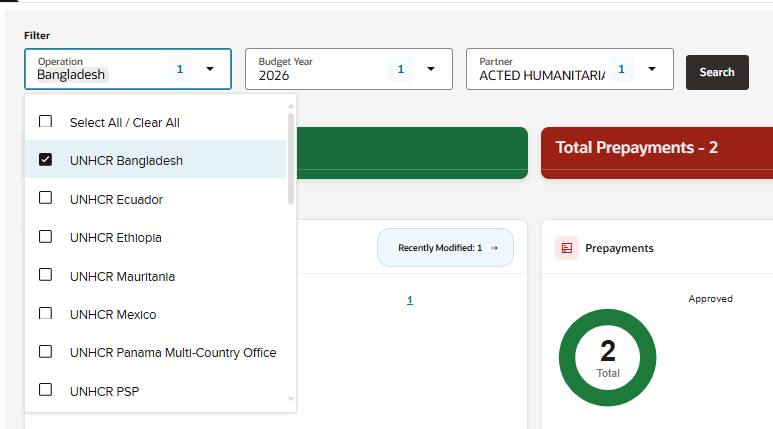
The Overview filter area contains Operation, Budget Year and Partner, followed by Search. Leave all filters blank and select Search to display all records available through your role and security context. Alternatively, select one or more filters to narrow the totals and status tables.
Partner users see records linked to their own partnership agreement; the Partner value is fixed to their organisation.
The Overview page filter controls.
Select one or more filters and run Search.
Read summary totals and status breakdowns
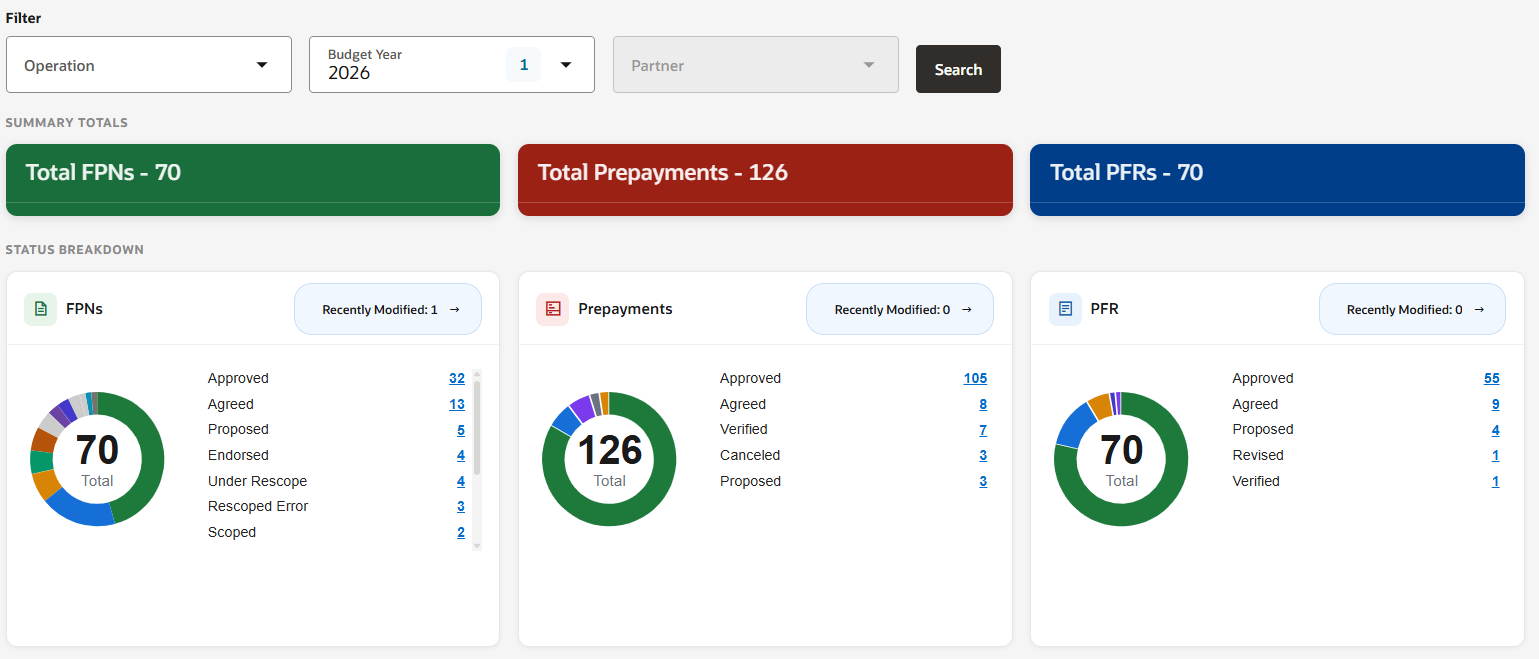
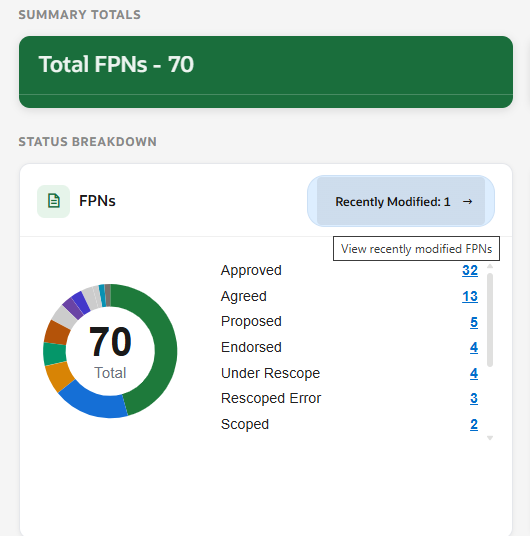
Summary Totals shows the number of Financial Plans, Prepayments and Project Financial Reports available for the selected criteria. The three Status Breakdown tables then divide each document type by status. Changing the filters and running Search refreshes these figures.
Summary Totals and the three Status Breakdown tables respond to the selected filters.
Open records from a status count
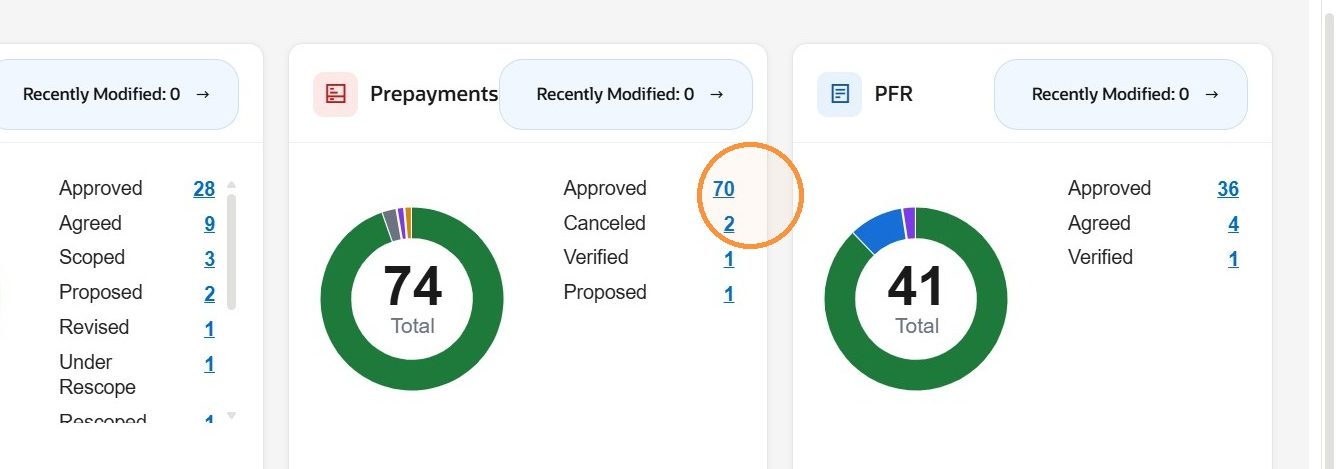
Each total and status count is a hyperlink. Select a count to move directly to the corresponding search results, such as all approved Financial Plans or all verified PFRs. The destination table is already limited to the selected category.
Review the total and count shown for each status.
Select a linked count to open the matching records.
Open recently modified records
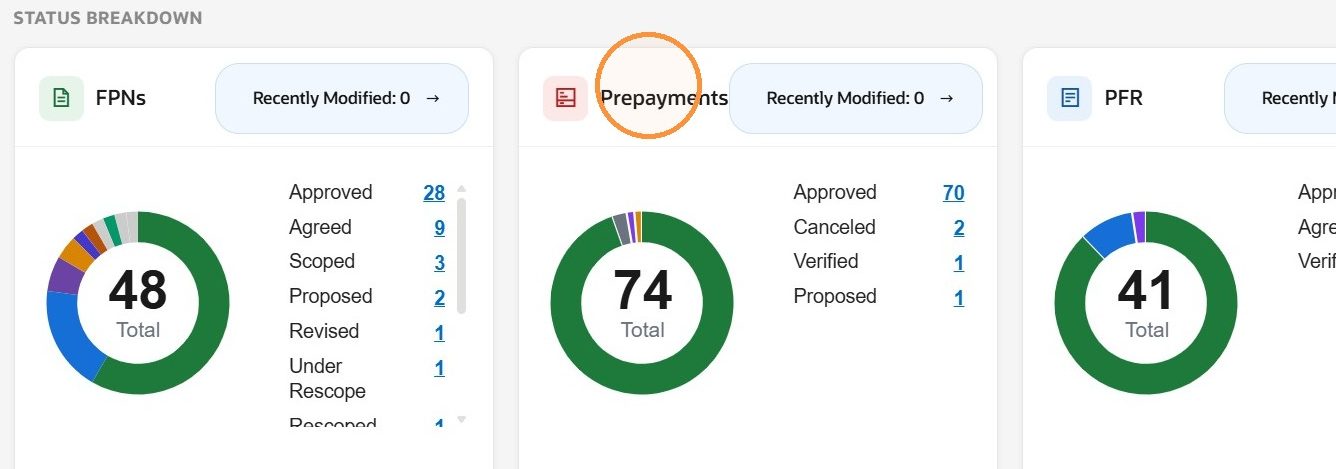
Recently Modified identifies records changed by another user since your last login. The feature is available for Financial Plans, Prepayments and PFRs. Select the relevant count to open the records and determine whether review or follow-up is required.
Review the Recently Modified count for each document type.
Select the count to open the recently modified records.
7
Financial Plan Search Page
Find, review, print and export Financial Plans
Understand the Financial Plan search page
Use this page to locate Financial Plans (FPNs), review their status and details, open an available action, print one selected plan or export the displayed table. The controls shown depend on the active role and record status.
Read the blue bar
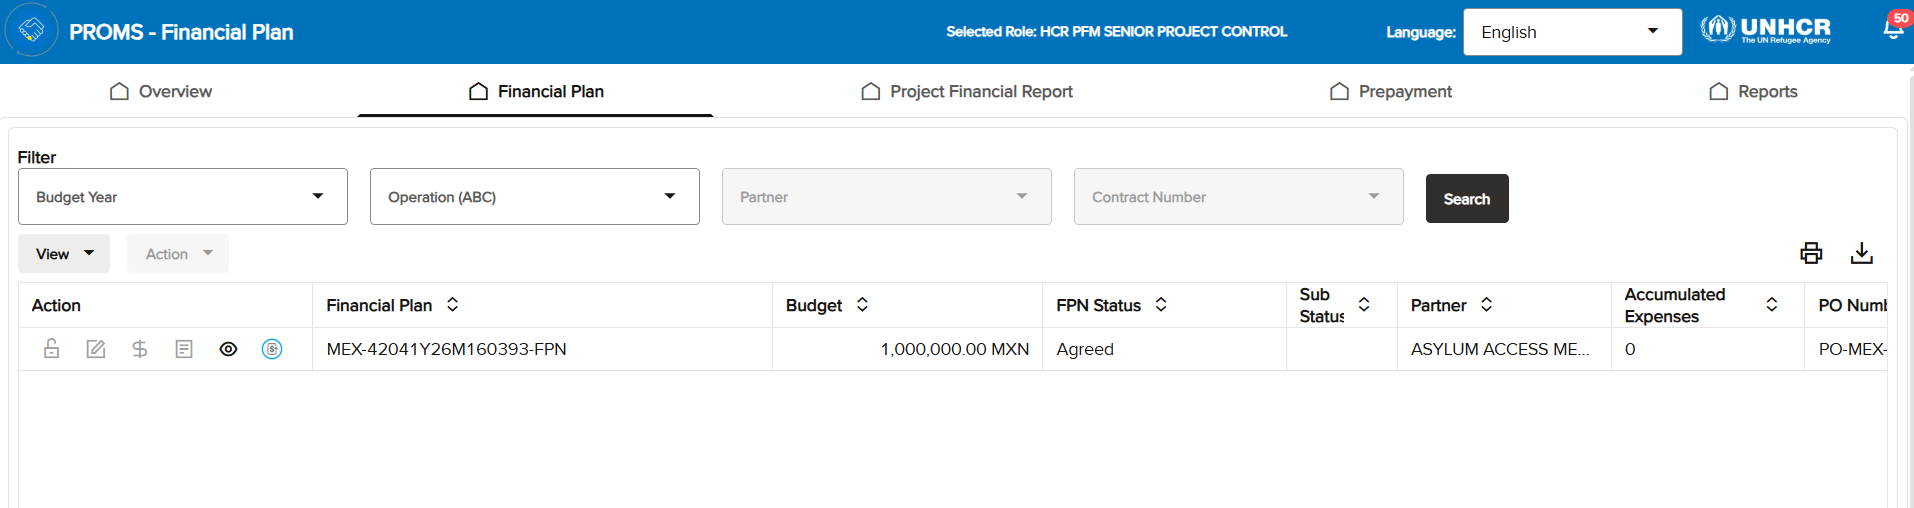
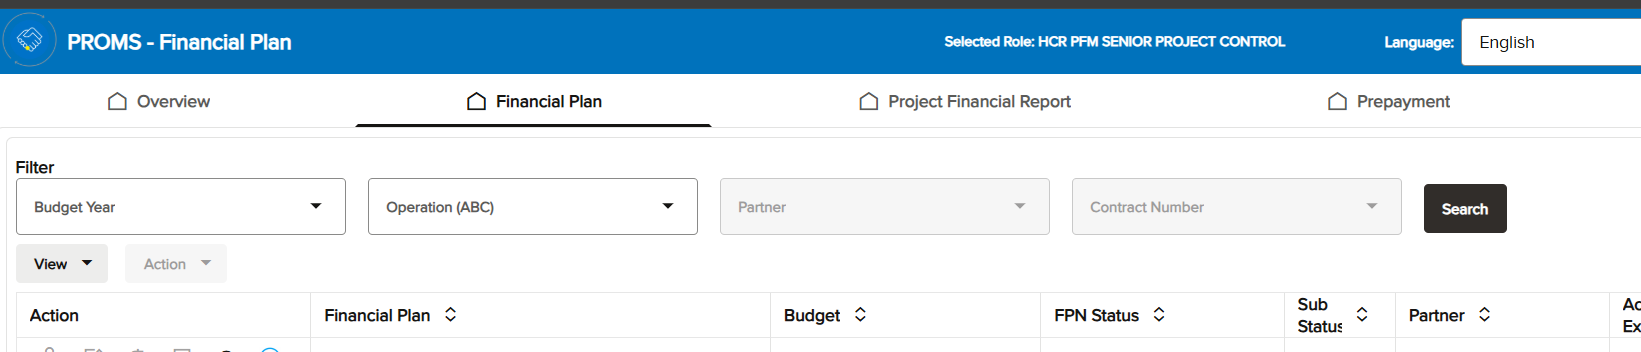
The page name on the left changes to PROMS – Financial Plan. The Selected Role, language and notification controls remain available. Confirm the role before using record actions.
The blue bar identifies the Financial Plan page and the active role.
Understand the filters and disabled fields
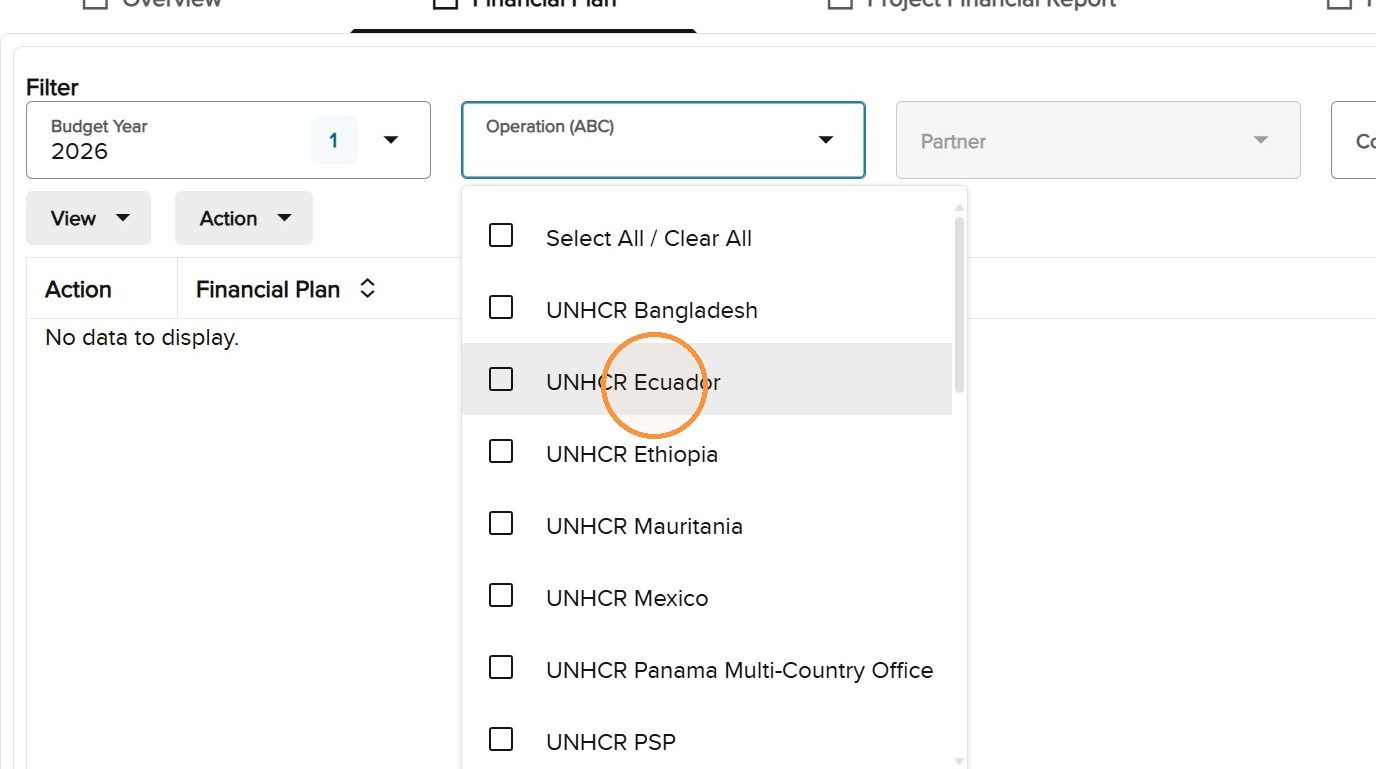
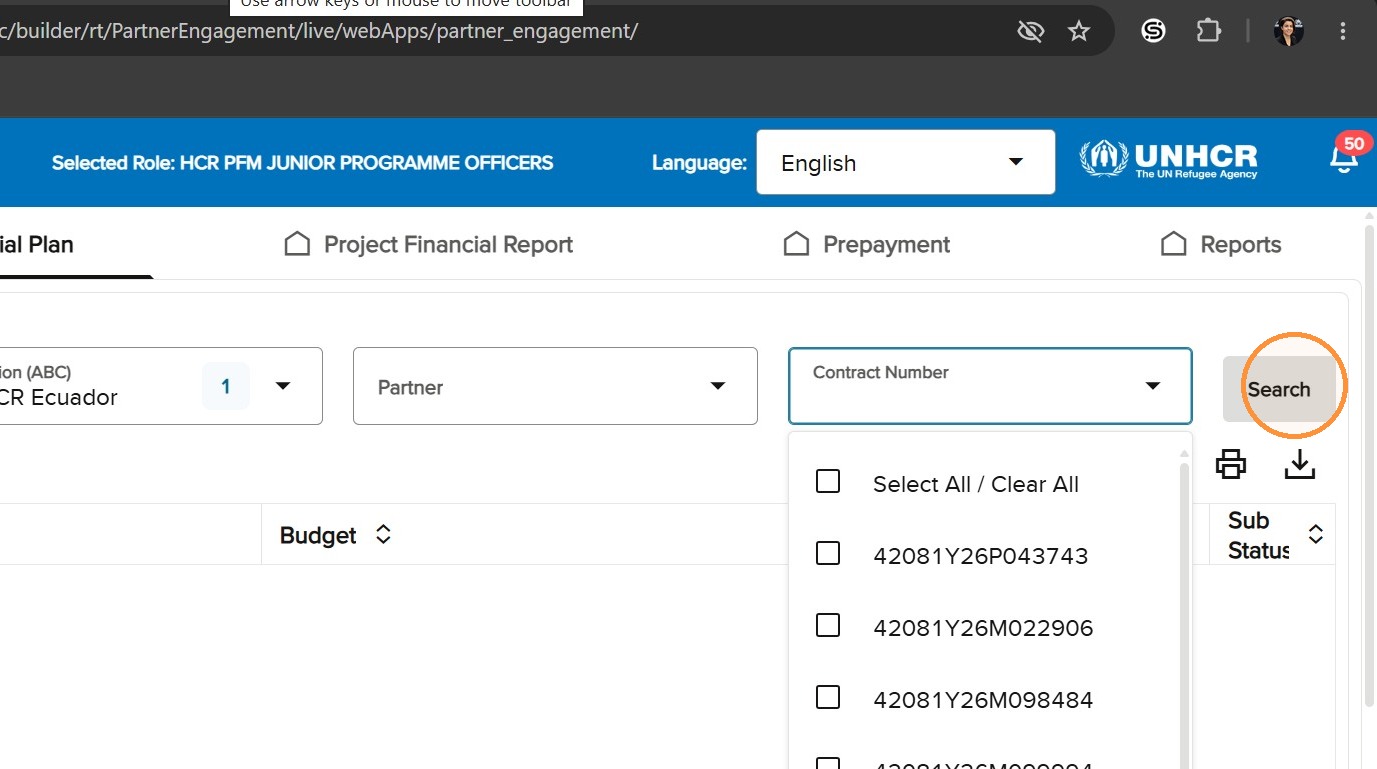
The page contains Budget Year, Operation, Partner and Contract Number. Partner and Contract Number may initially be disabled. Select Budget Year to activate Contract Number. Select Operation to activate Partner. Contract Number is editable, so you can paste a known contract number directly.
Partner and Contract Number are initially disabled until their controlling filters are selected.
Run Search and check the results
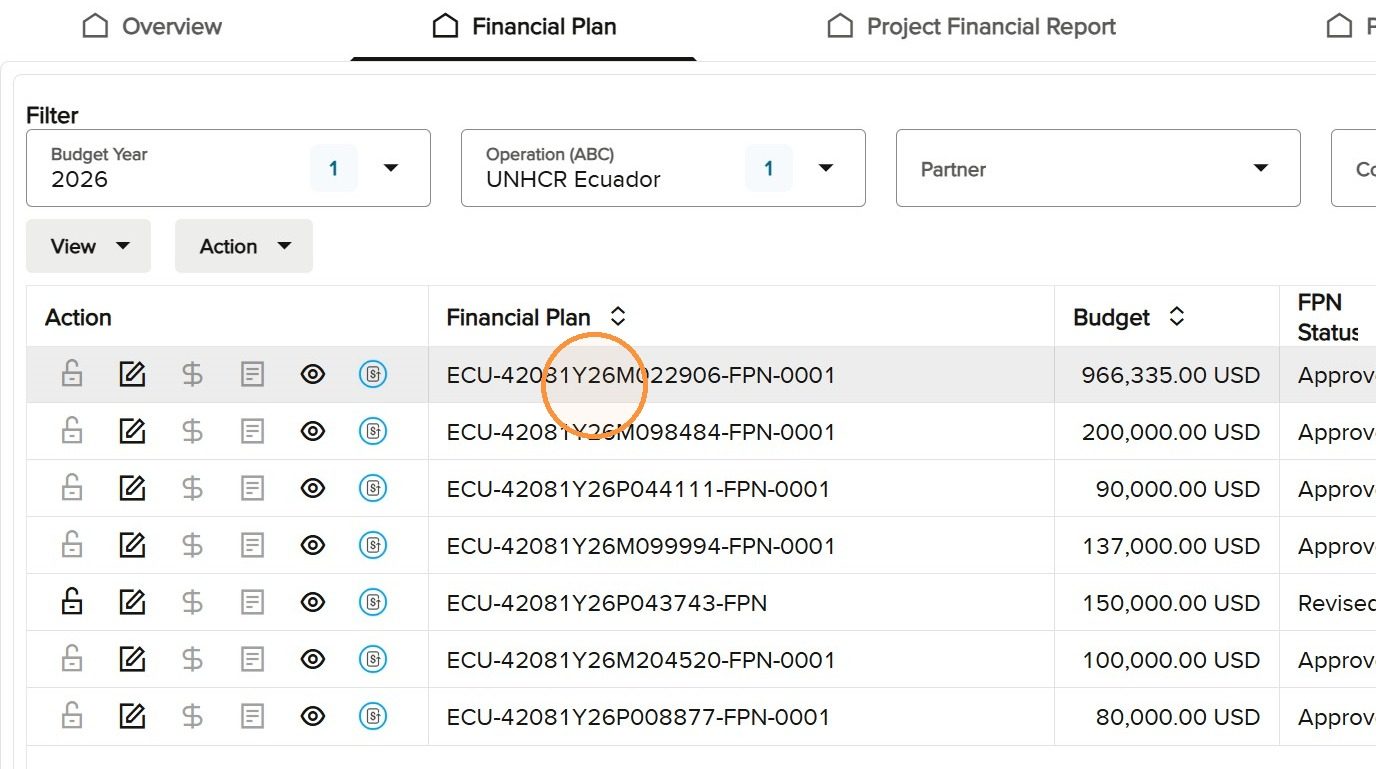
Select the required Budget Year and Operation. If necessary, choose a Partner or paste a Contract Number. Select Search and confirm that the results match the criteria used. Leaving available filters blank broadens the results to all records permitted by your access.
Selecting an Operation activates the Partner filter.
Paste a Contract Number to locate a specific agreement.
Locate the table controls
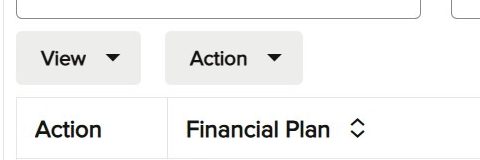
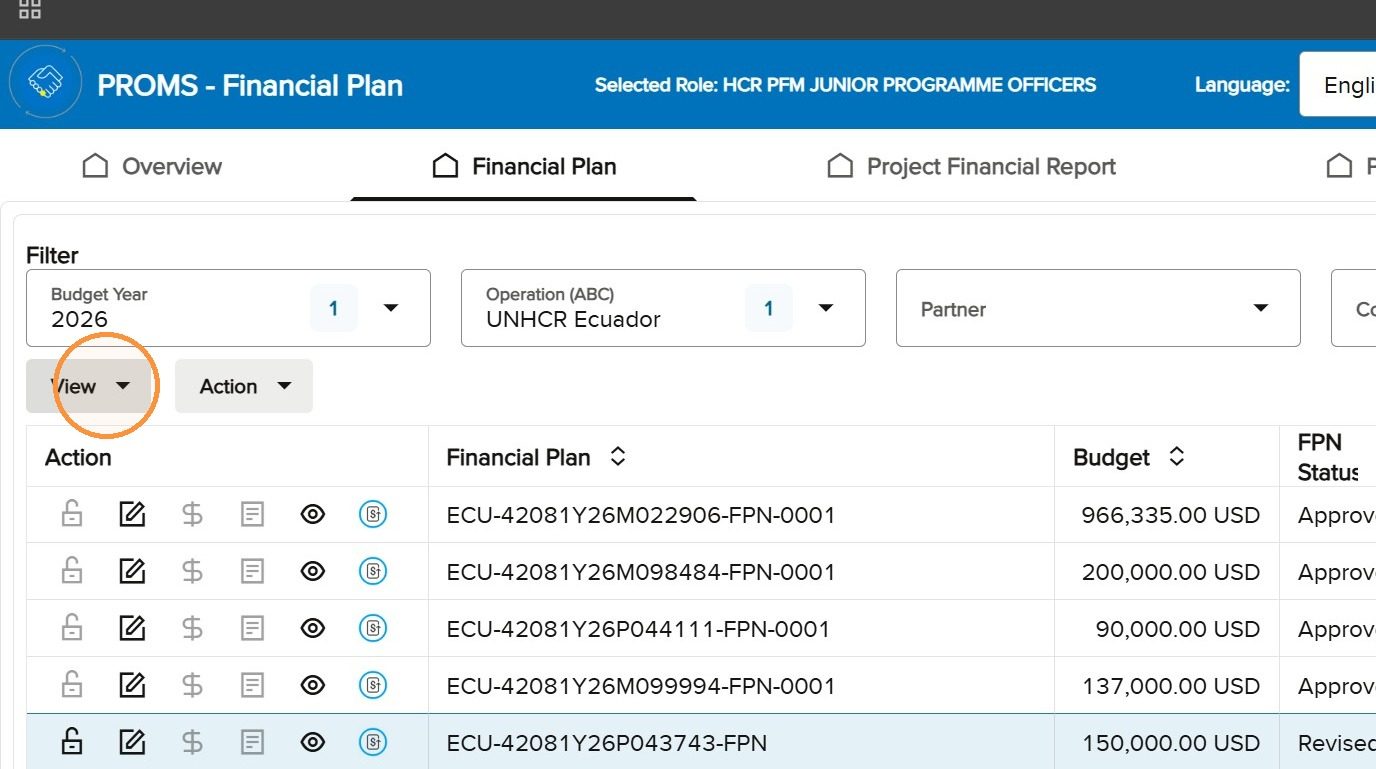
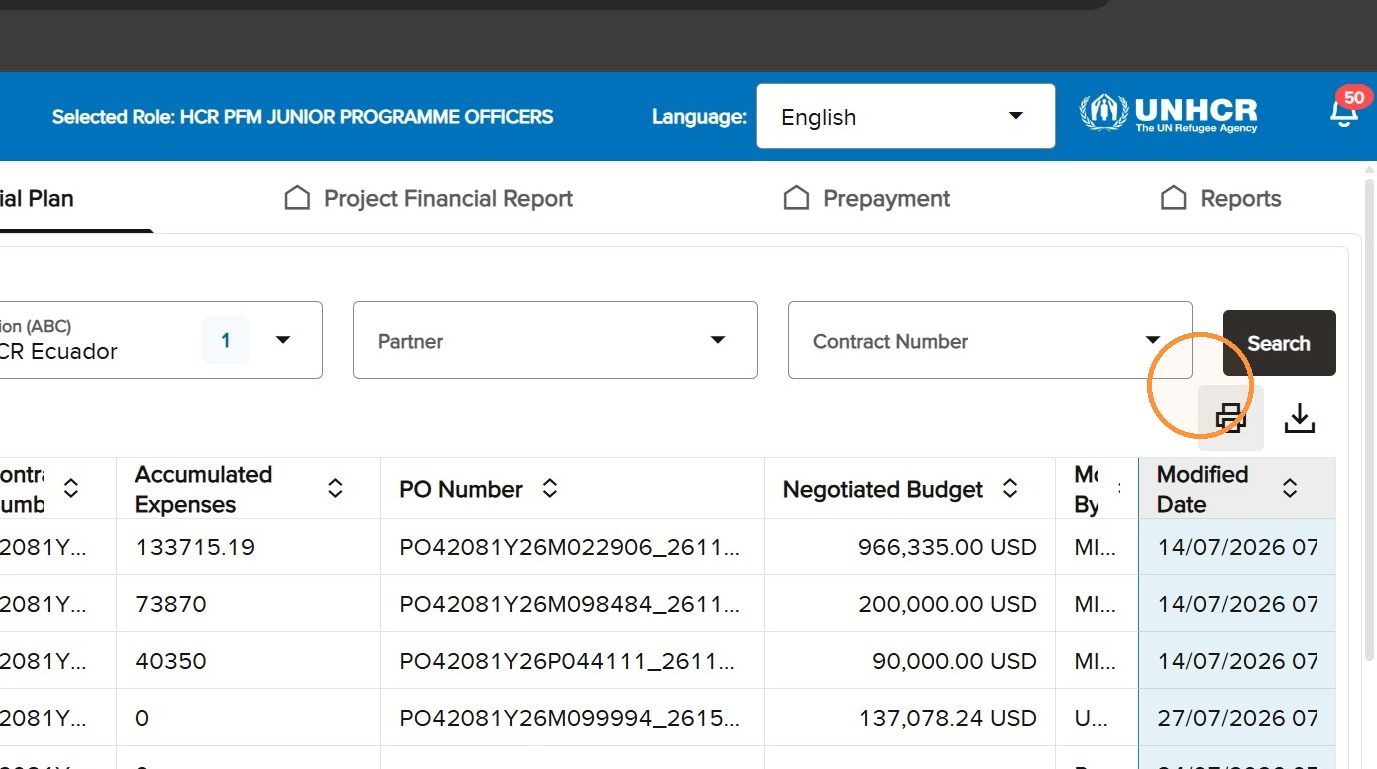
Above the results table, View and Action appear on the left. The Print and Export icons appear on the right. First select the relevant row when an action applies to one record.
View and Action controls are located above the table on the left.
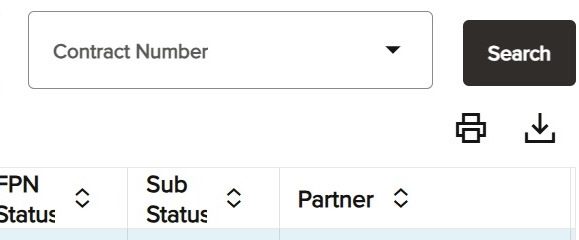
Print and Export controls are located above the table on the right.
Add or remove table columns
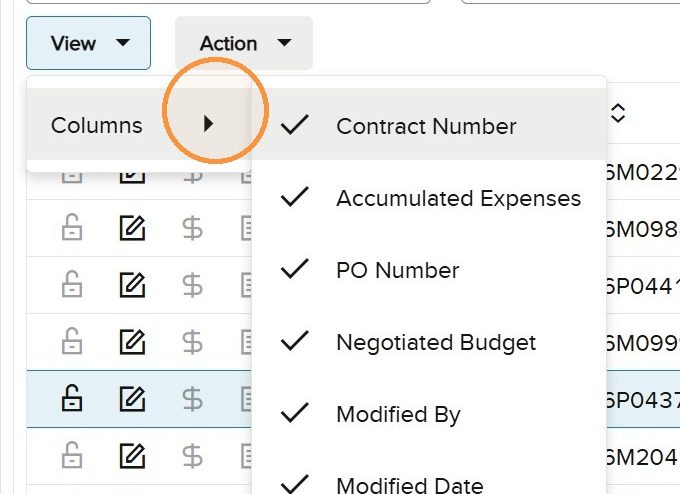
Open View and select the columns needed for your review. The visible column selection also determines which fields are included when the table is exported. Remove columns that are not needed to keep the table readable.
Open View to configure the result table.
Select the Financial Plan columns required for review or export.
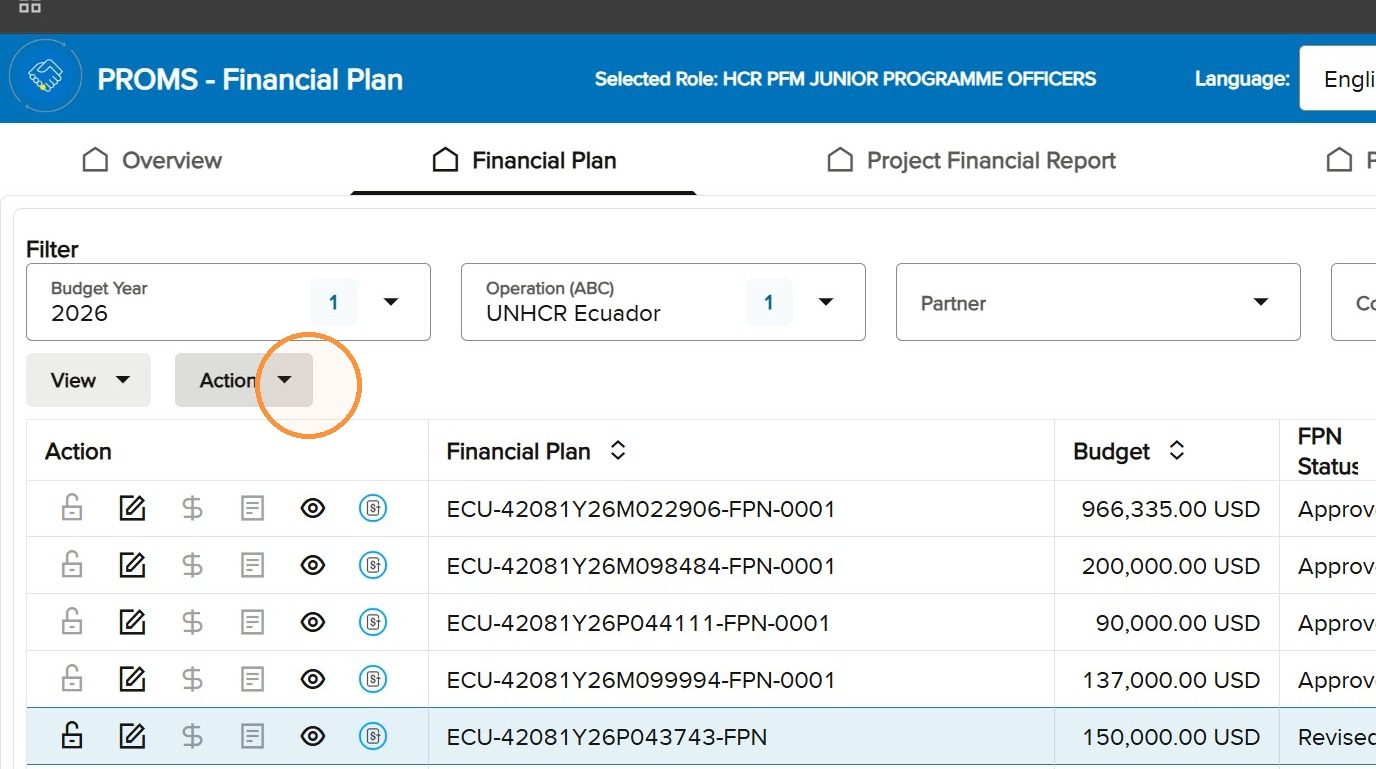
Use the Action menu
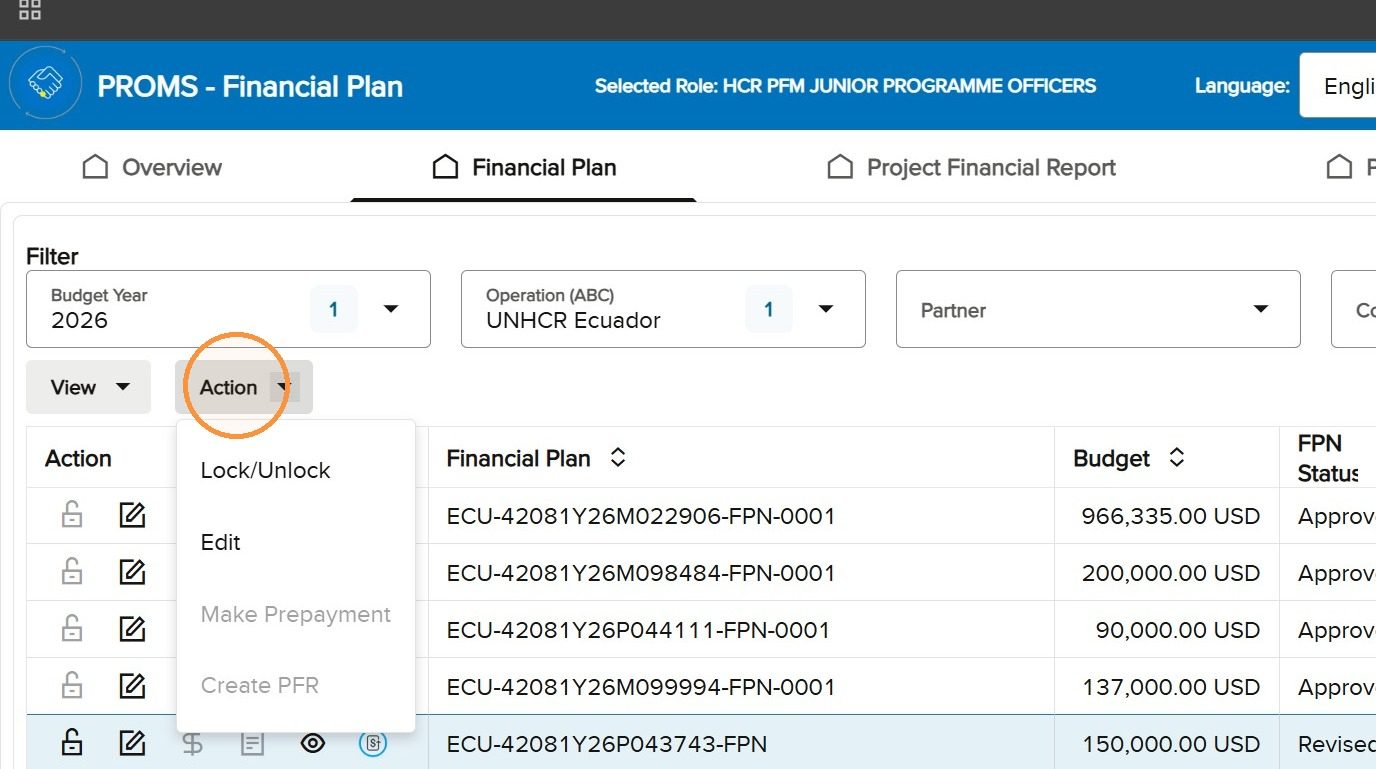
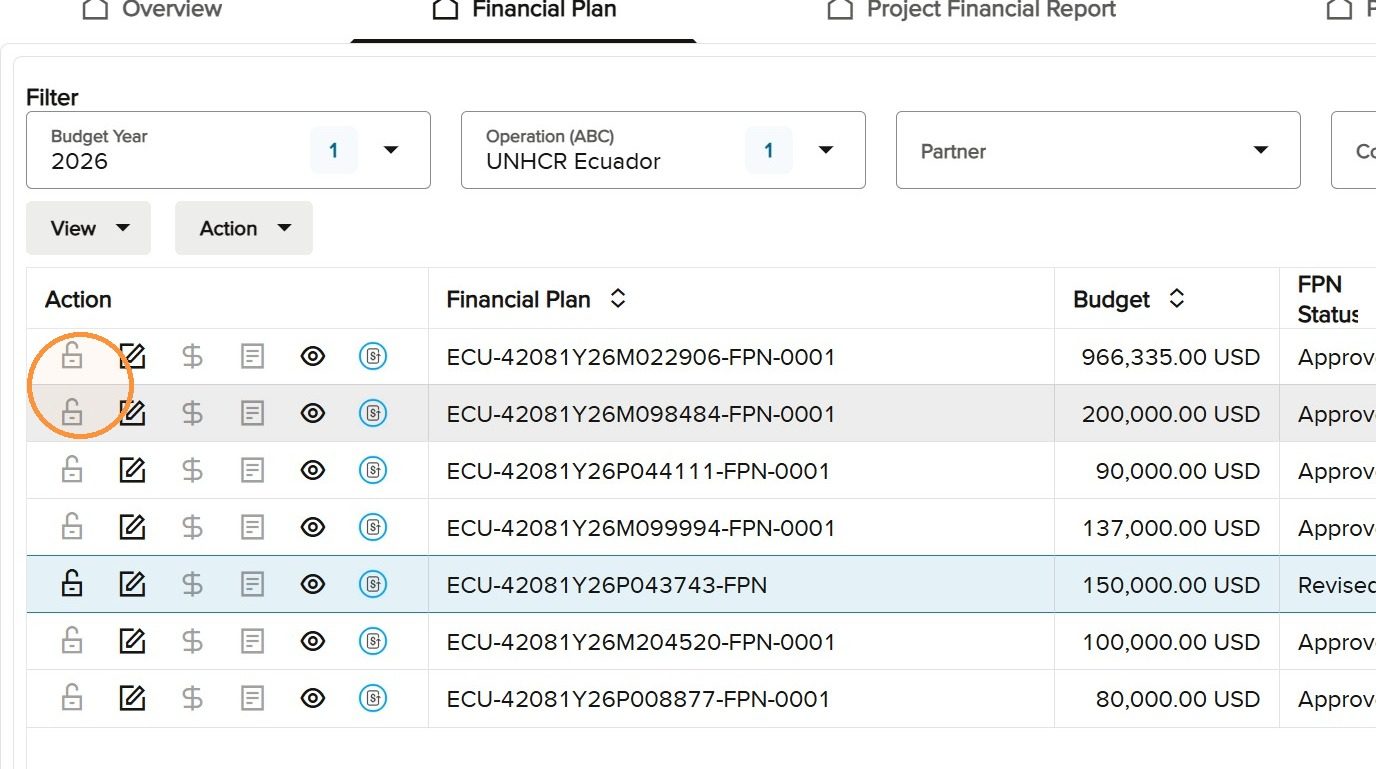
Select a row and open Action to see the operations currently available. These can include Lock, Unlock, Edit, Make Prepayment and Create a PFR. The same choices appear as icons in the row-level Action column.
Open the Action menu for the selected Financial Plan.
The Action column provides the corresponding row-level icons.
Recognise the action icons and when to use them
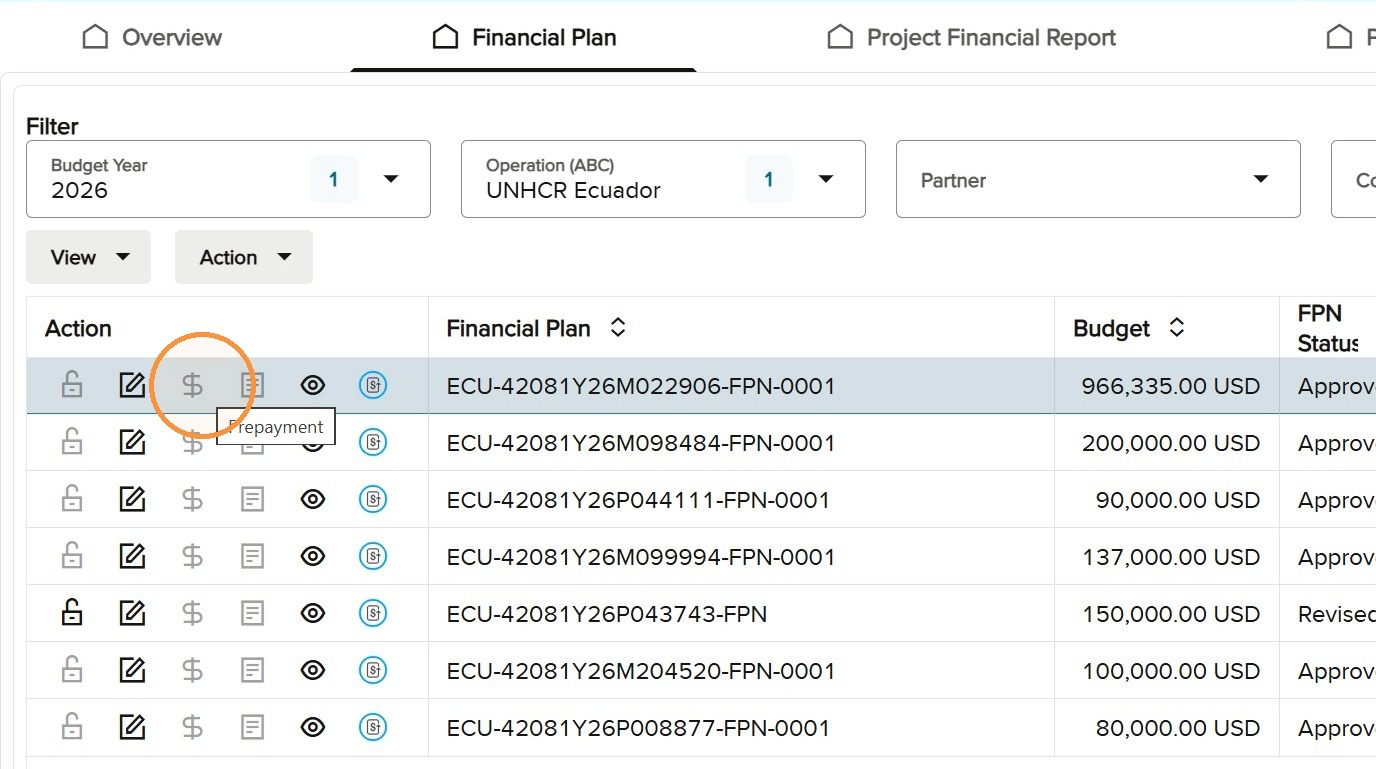
Lock and Unlock are reserved for UNHCR personnel. The person who locks a document is responsible for unlocking it; the PROMS App Administrator can unlock a document when necessary. Edit opens the Financial Plan for permitted changes. Make Prepayment and Create PFR are partner-initiated actions. View is available across roles.
A dark icon indicates that the action is available. A grey icon indicates that the current role or record status does not permit the action.
Lock, Unlock and Edit icons in the Action column.
Start Prepayment, Start PFR and View icons in the Action column.
Financial Plan search page columns
Column
What the column shows
Action
Icons for the row-level actions available to the current role and record status.
Financial Plan
The Financial Plan number for the record.
Budget
The budget originating from COMPASS.
FPN Status
The current stage of the Financial Plan negotiation process.
Sub Status
Additional information when a processing or business issue exists.
Organization Name
The partner organisation linked to the agreement.
Contract Number
The contract number for the partnership agreement.
Accumulated Expenses
Expenses accumulated against the Financial Plan.
PO Number
The related purchase order number.
Negotiated Budget
The final budget after negotiation, rather than the original COMPASS budget.
Modified By
The user who most recently modified the Financial Plan.
Modified Date
The date on which the Financial Plan was most recently modified.
Print one Financial Plan
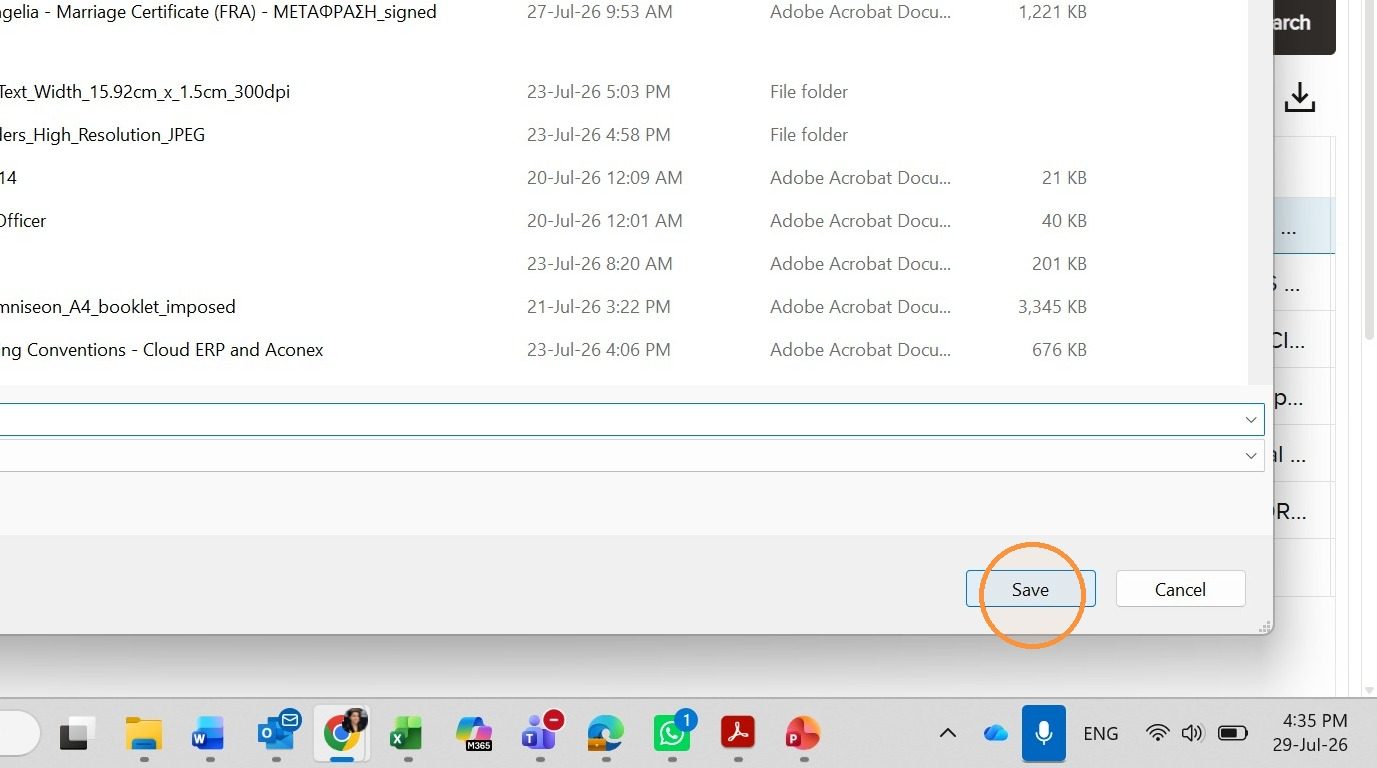
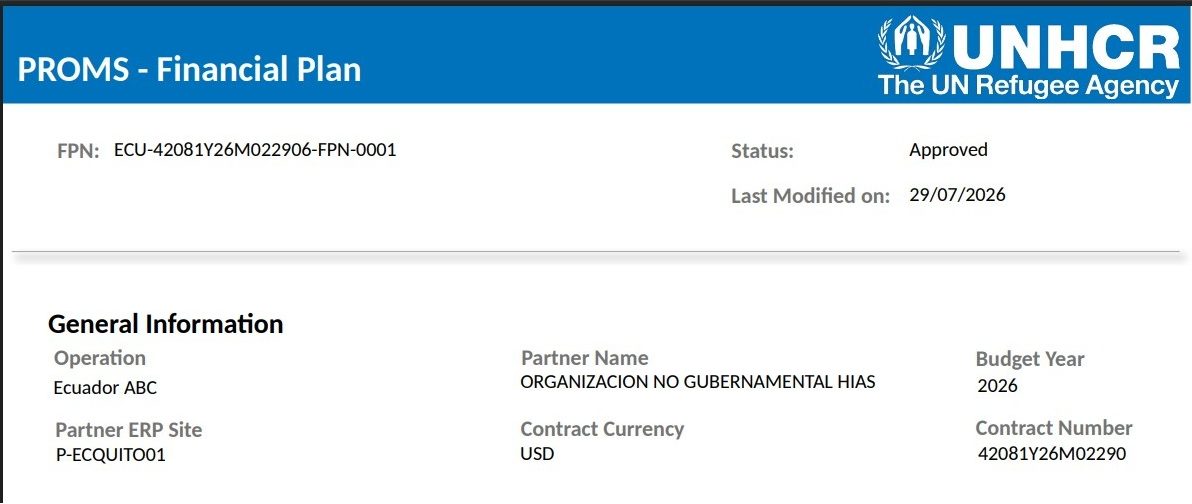
Select one Financial Plan and select Print. Wait for the PDF to be generated, then open it from the browser download history. A Financial Plan PDF can be downloaded during the process. Once negotiation is completed, the final PDF is automatically saved in the Aconex Document Register and UNHCR shares it with the partner through a transmittal.
Select the Financial Plan to be printed.
Select Print to generate the PDF.
Open the generated file from the browser download history.
Review the generated Financial Plan PDF.
Export the full table
Select Export to create an Excel file containing the records currently displayed by the search and the columns selected through View. Unlike Print, Export applies to the result set rather than one record.
Export the filtered Financial Plan table and its visible columns.
Navigate pages and change visible rows
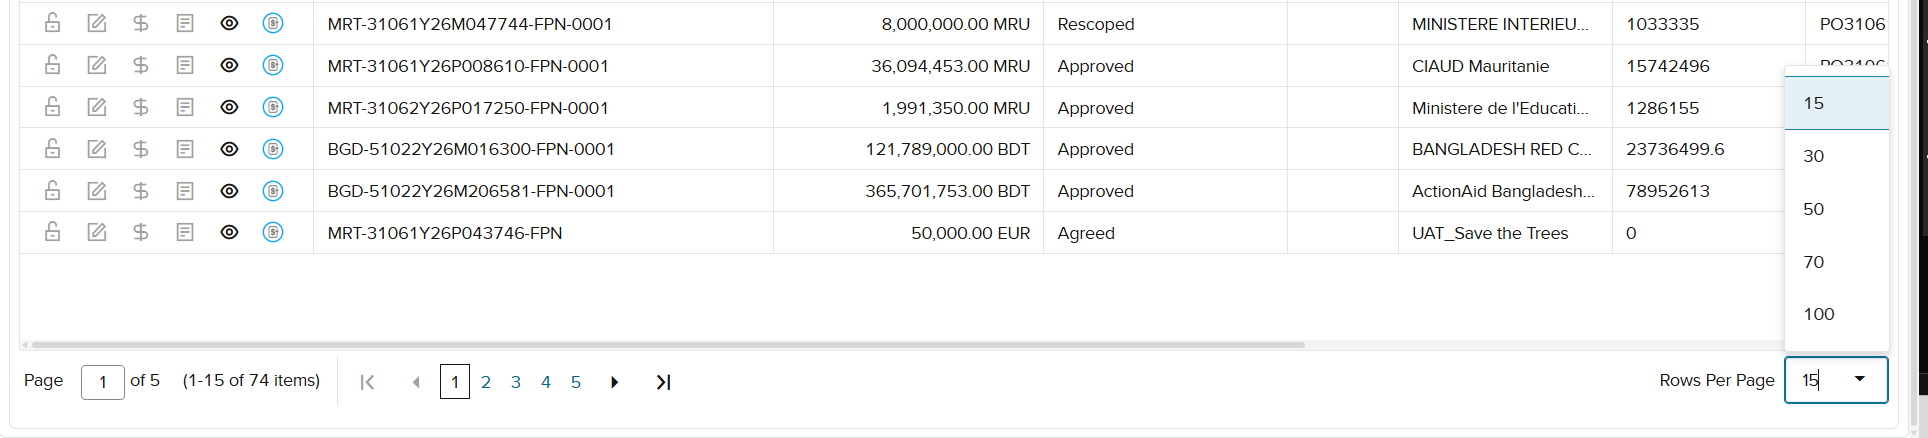
Use the controls at the lower left to move through result pages. Use the rows-per-page control at the lower right to increase or reduce the number of records displayed. The available options include 15, 30, 50, 70 and 100 rows.
Use pagination and the rows-per-page selector at the bottom of the table.
8
Project Financial Report Search Page
Find, review, print and export Project Financial Reports
Understand the PFR search page
Use the Project Financial Report (PFR) search page to find reports, review status and invoice information, open permitted actions, print one report or export the result table. The search and table controls follow the same logic as the Financial Plan page.
Read the blue bar
The blue bar identifies the Project Financial Report page and continues to show the Selected Role, language and notifications. Confirm the role before selecting a record or action.
Use the filters and recognise disabled fields
The filters are Budget Year, Operation, Partner and Contract Number. Budget Year activates Contract Number, while Operation activates Partner. For partner accounts, Partner is fixed to the user’s organisation.
The PFR search page uses the same four cascading filters.
Run Search and check the results
Choose the filters required for the task and select Search. Confirm that the result rows reflect the selected year, operation, partner or contract. Clear optional filters and search again when a broader result set is required.
Locate the table controls and configure columns
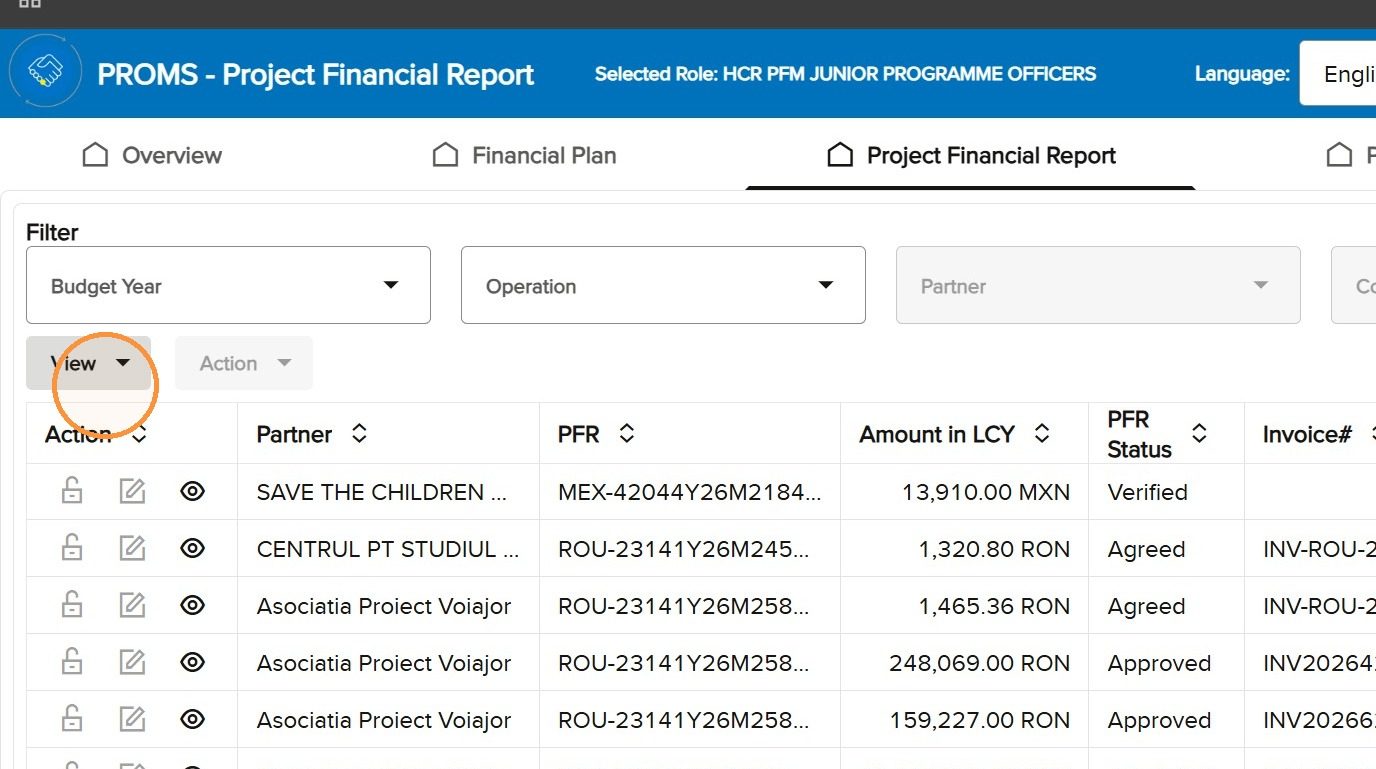
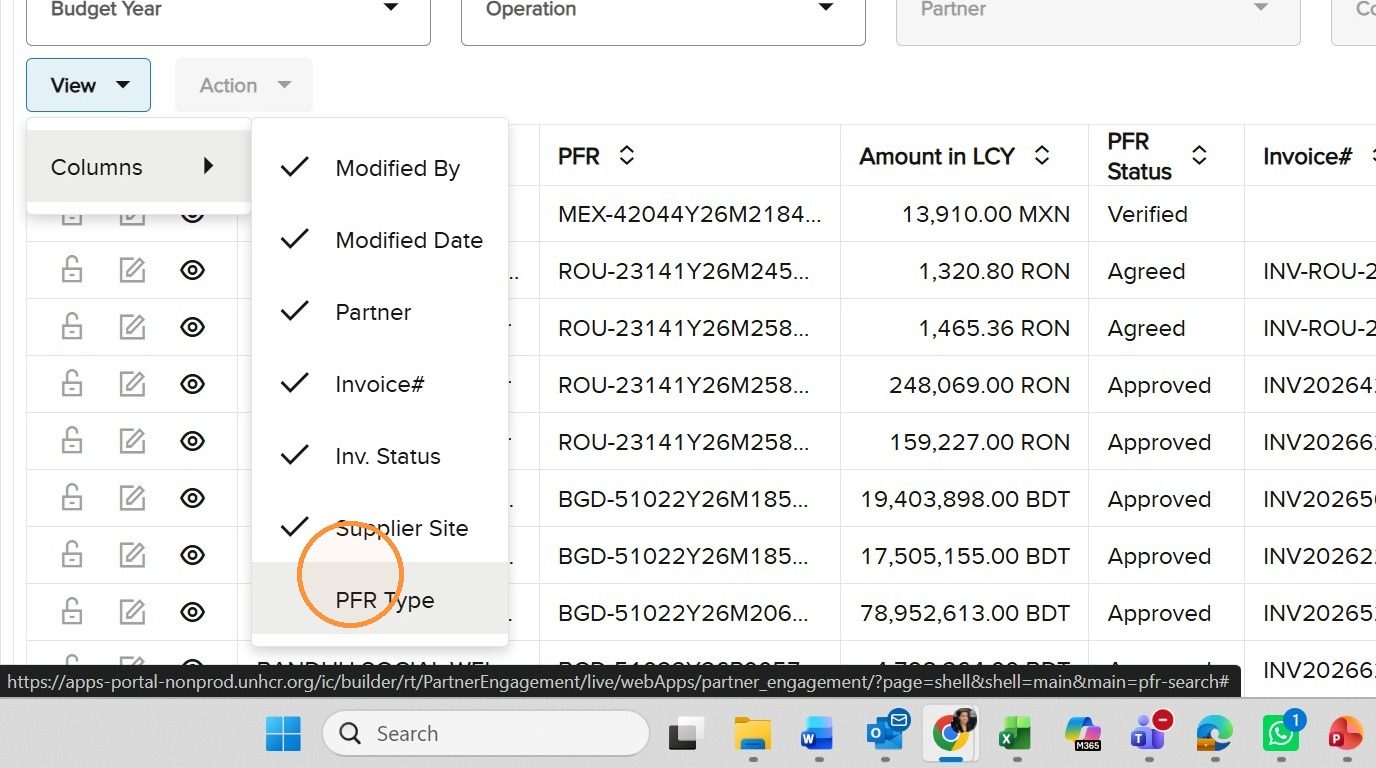
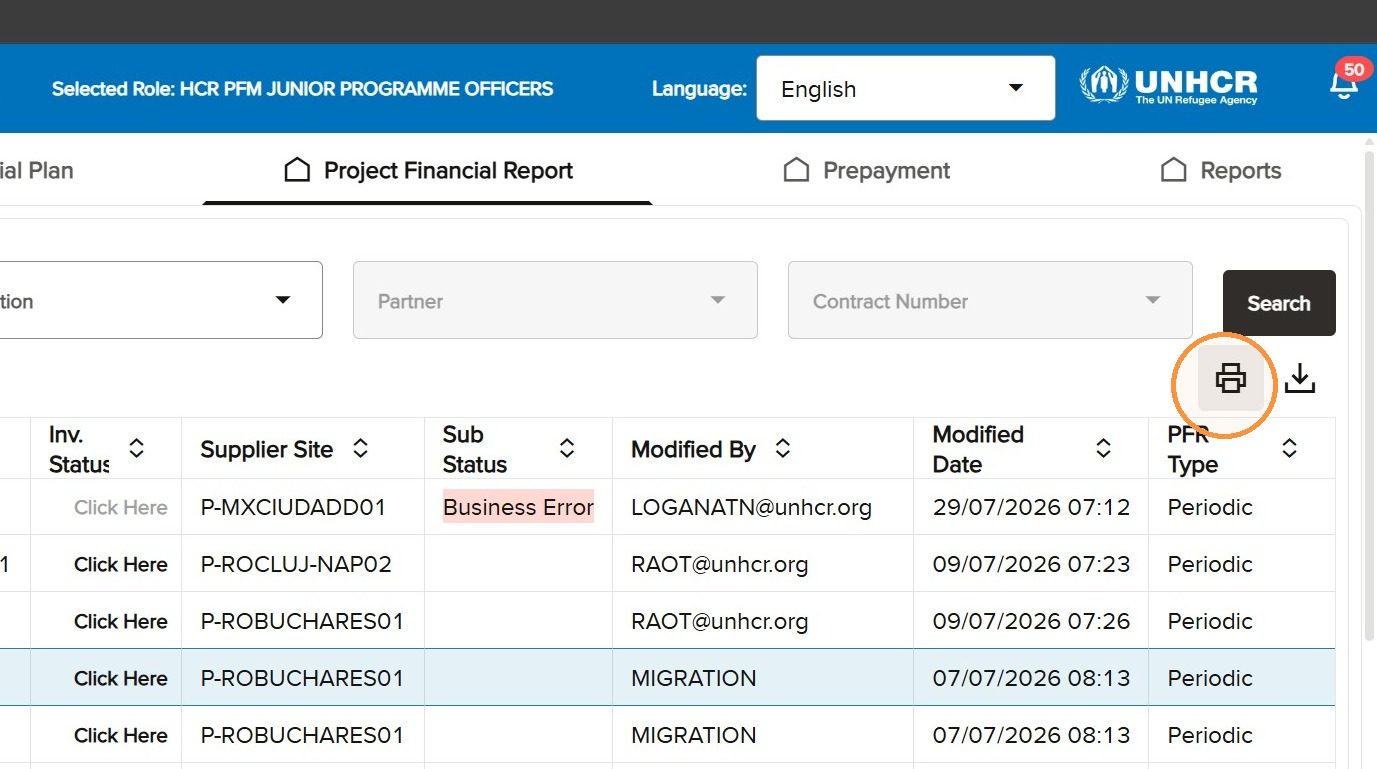
Use View to add or remove table columns. Select all fields needed for on-screen review and export. Print and Export are positioned above the results, following the same pattern as on the Financial Plan page.
Open View on the PFR search page.
Select additional columns, including PFR Type where required.
Use the Action menu and recognise icons
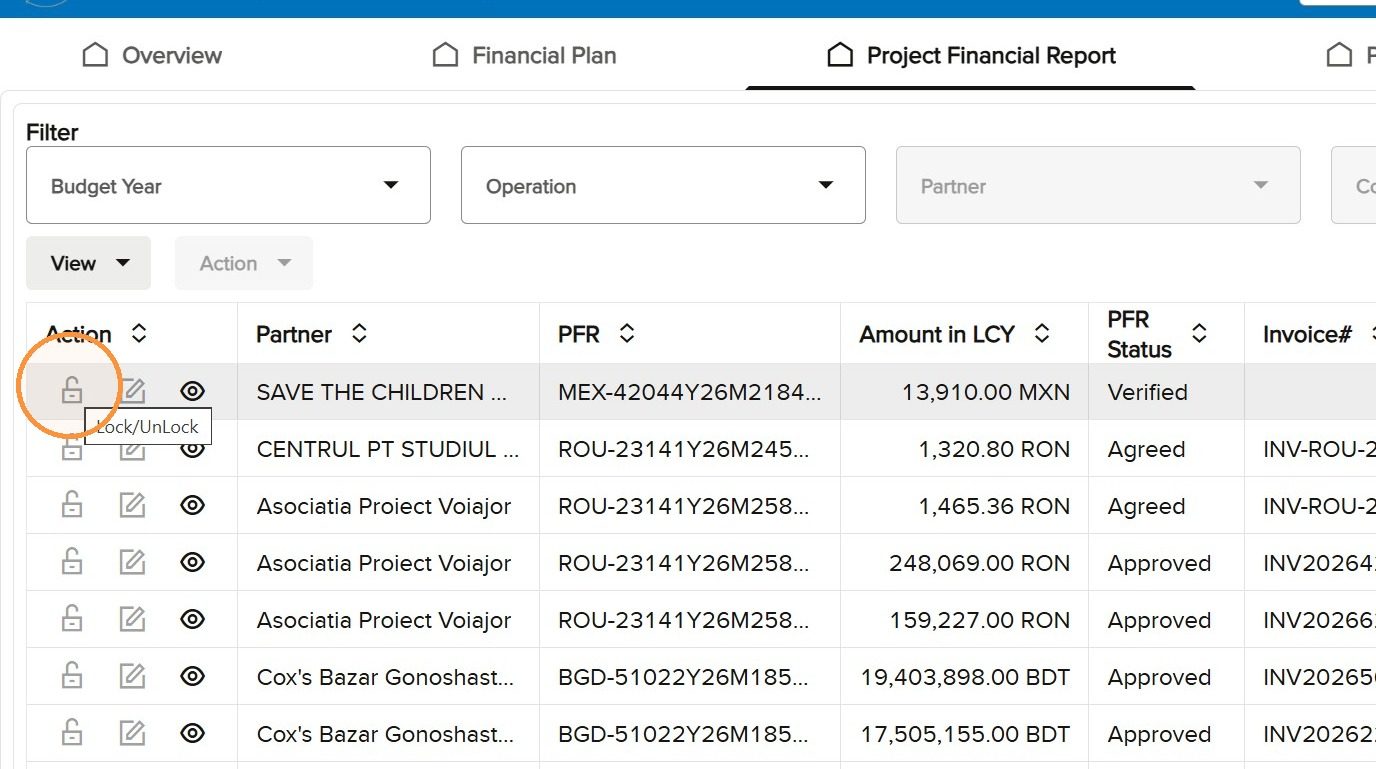
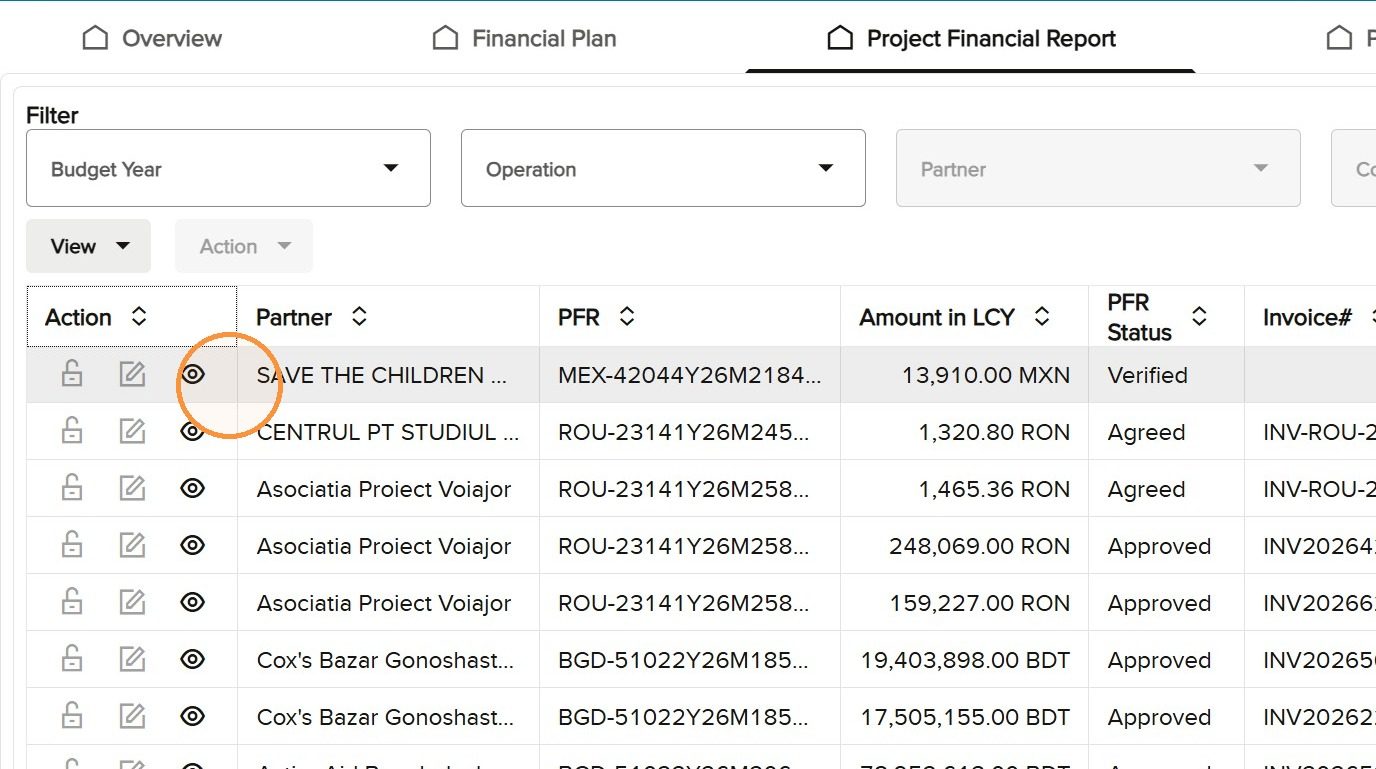
The PFR Action column contains Lock or Unlock, Edit and View. Lock and Unlock remain reserved for UNHCR personnel. Edit becomes active when the current role and workflow status permit changes. View is available to all users. Dark icons are available; grey icons are unavailable.
Lock or Unlock and Edit actions on a PFR row.
View is available for users who need read-only access.
PFR search page columns
Column
What the column shows
Action
Lock or Unlock, Edit and View icons available for the record.
Partner
The name of the partner organisation.
PFR
The Project Financial Report number.
Amount in LCY
The report amount in local currency.
PFR Status
The current step of the PFR process.
Invoice Number
The invoice number linked to the PFR.
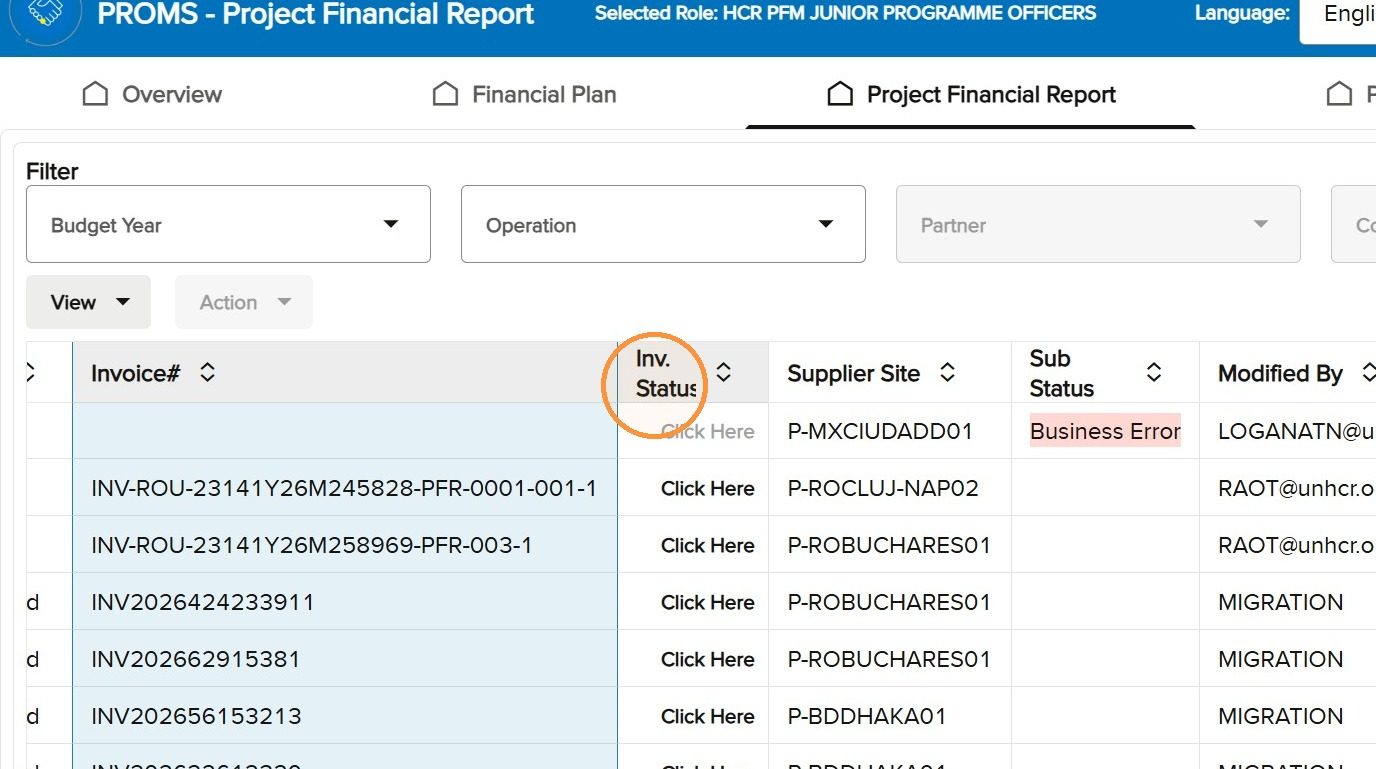
Inv. Status
A hyperlink that opens the current invoice status in Cloud ERP.
Supplier Site Status
An explanation of a supplier-site or business error, when present.
Modified By
The user who most recently modified the PFR.
Modified Date
The date on which the PFR was most recently modified.
PFR Type
Whether the report is Periodic or Final.
Check invoice status in Cloud ERP
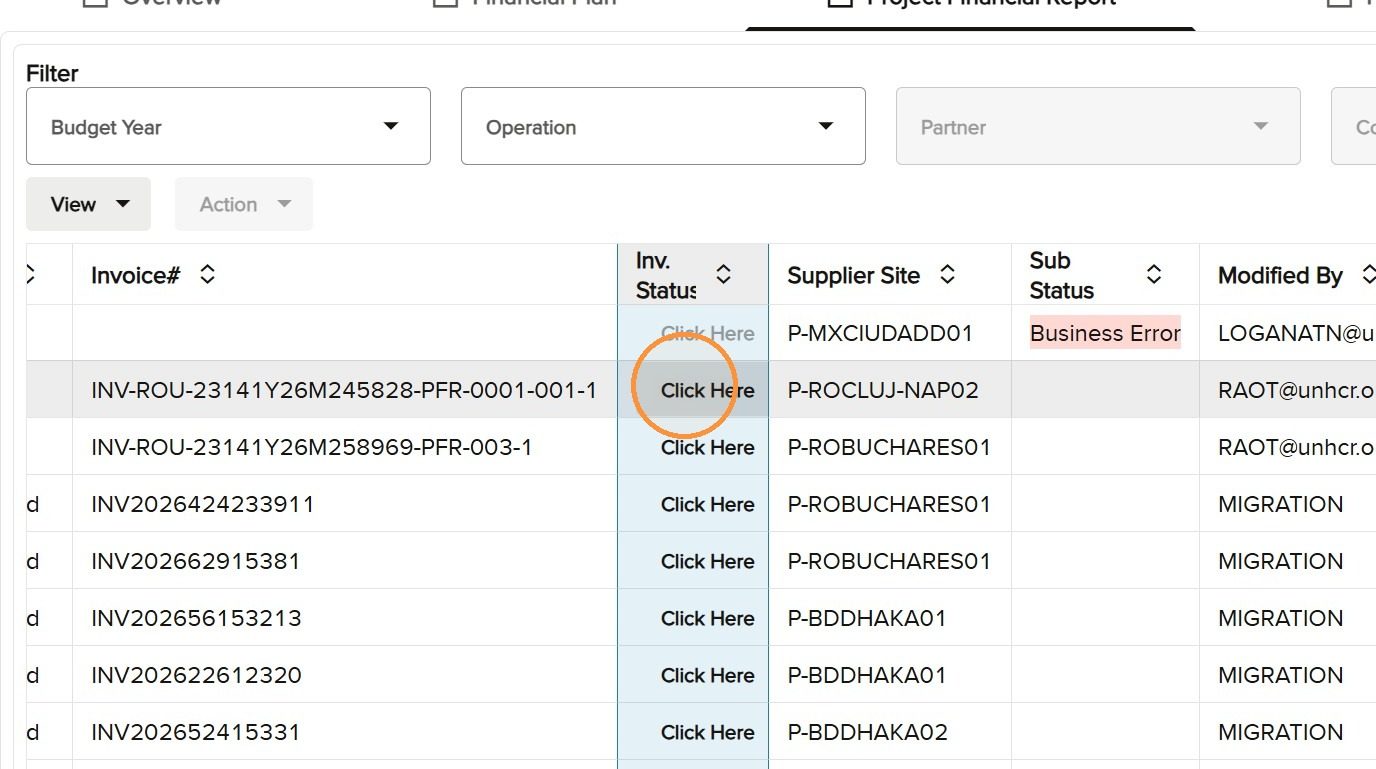
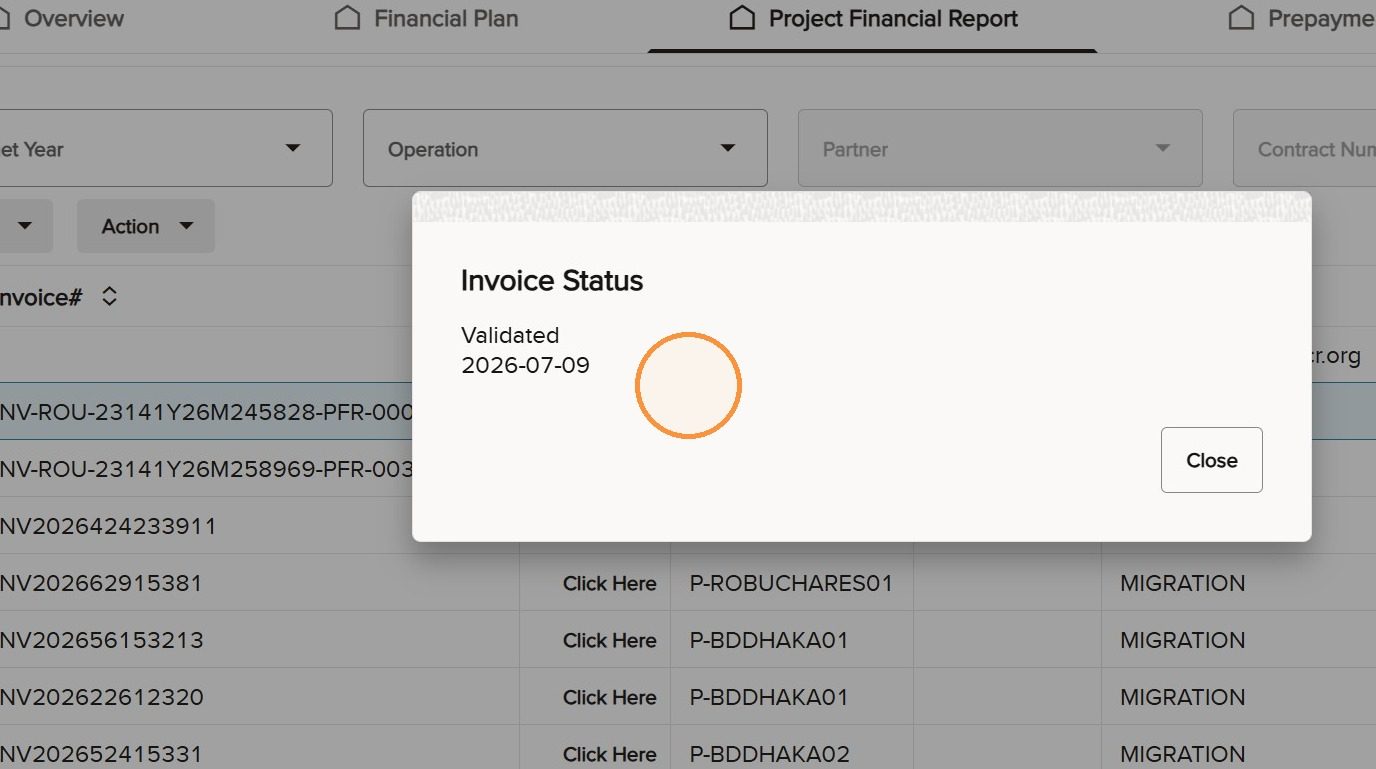
Locate Inv. Status in the result row and select the linked value. A panel opens with the invoice status held in Cloud ERP. Review the information and close the panel when finished.
Locate the linked invoice status in the PFR table.
Select the invoice status link.
Review the invoice information returned from Cloud ERP.
Print one PFR
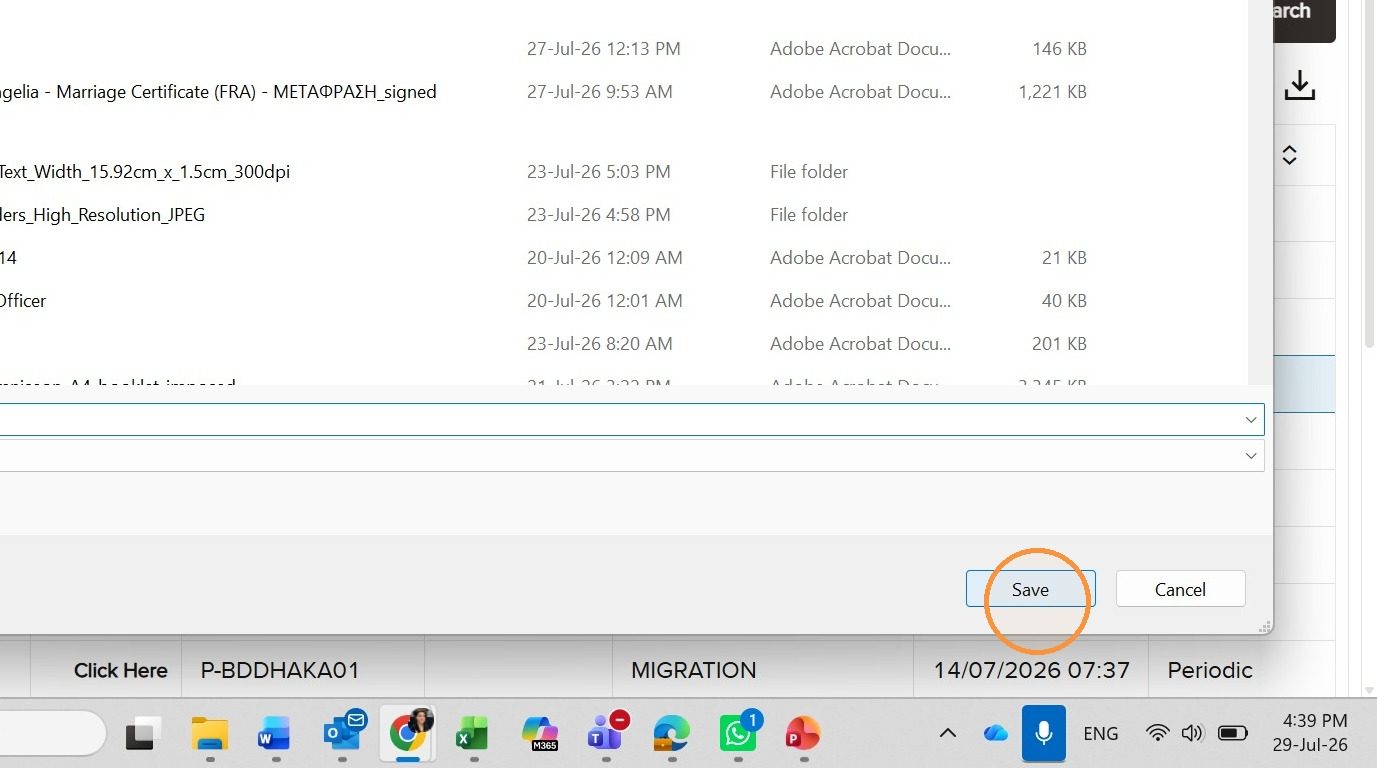
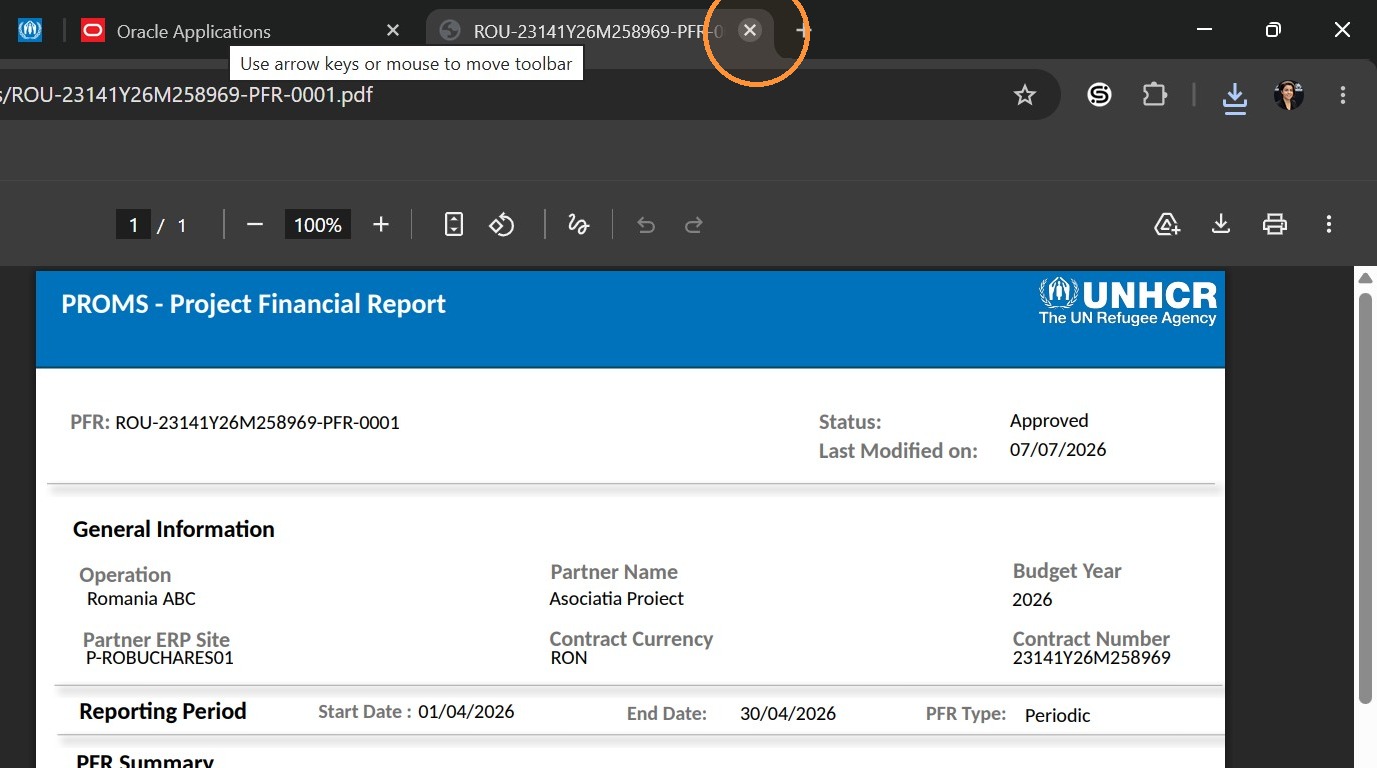
Select one PFR and select Print. Save the generated PDF and open it from the browser download history. A PFR PDF can be downloaded during submission and review. The final approved PFR is automatically uploaded to the Aconex Document Register; UNHCR is responsible for sharing it with the partner through a transmittal.
Select one PFR and start the print action.
Save the generated PFR PDF.
Review the generated PFR PDF.
Export the full table
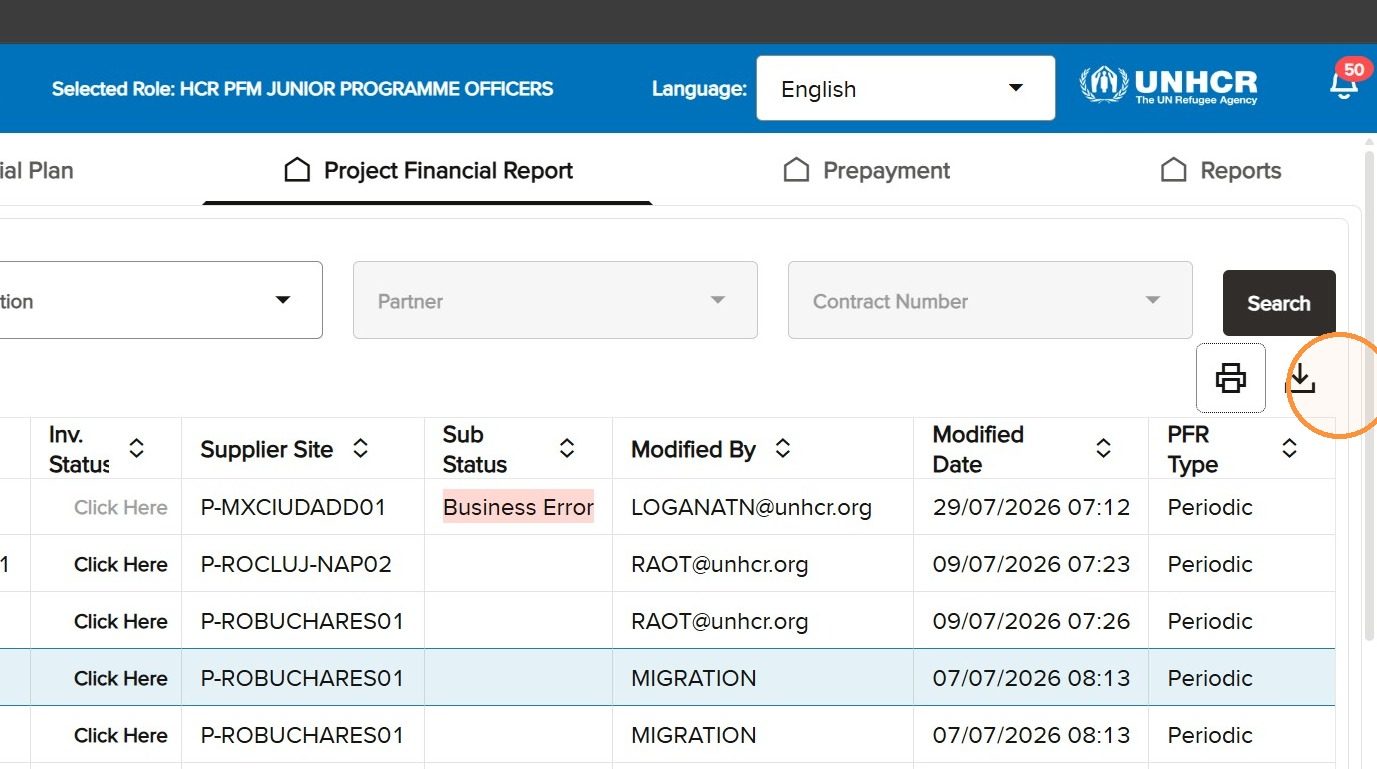
Select Export to create an Excel file containing the filtered PFR results and the columns selected through View.
Export the displayed PFR table to Excel.
Navigate pages and change visible rows
Use the pagination controls at the lower left to move between result pages. Use the rows-per-page control at the lower right to change how many PFRs appear on one page.
9
Prepayment Search Page
Find prepayments, review invoice details and export results
Understand the Prepayment search page
Use the Prepayment search page to locate prepayment records, review current processing information, open available actions, inspect invoice details and export the result set. This page does not provide the single-record Print function used for Financial Plans and PFRs.
Read the blue bar
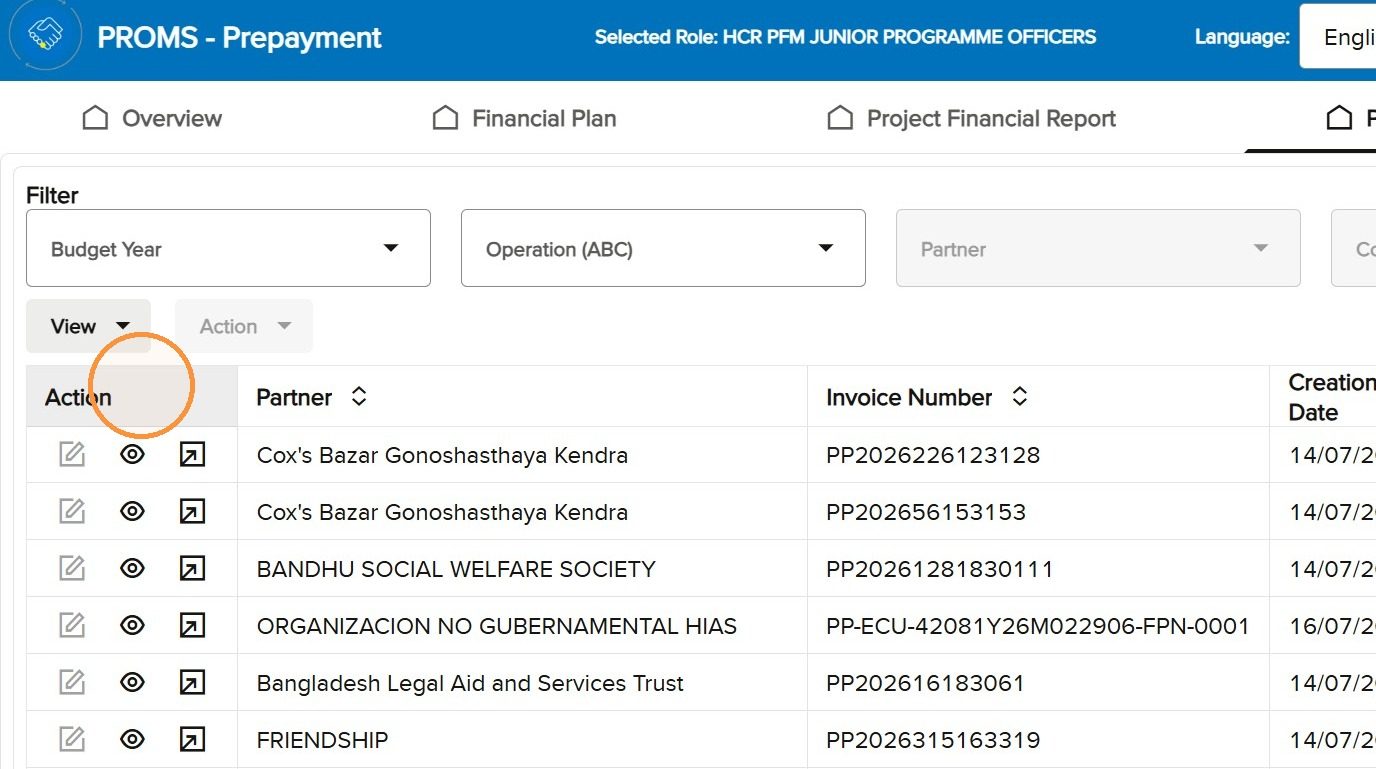
The blue bar identifies the Prepayment page and retains the Selected Role, language and notification controls. Check the role before opening an action.
Use the filters and recognise disabled fields
The filters are Budget Year, Operation, Partner and Contract Number. The same dependencies apply: Budget Year activates Contract Number, and Operation activates Partner. Contract Number remains editable, allowing a known number to be pasted directly.
The Prepayment page uses the same cascading filter pattern.
Run Search and check the results
Select the required criteria and choose Search. Review the result table to confirm that the records correspond to the chosen year, operation, partner or contract.
Locate the table controls and configure columns
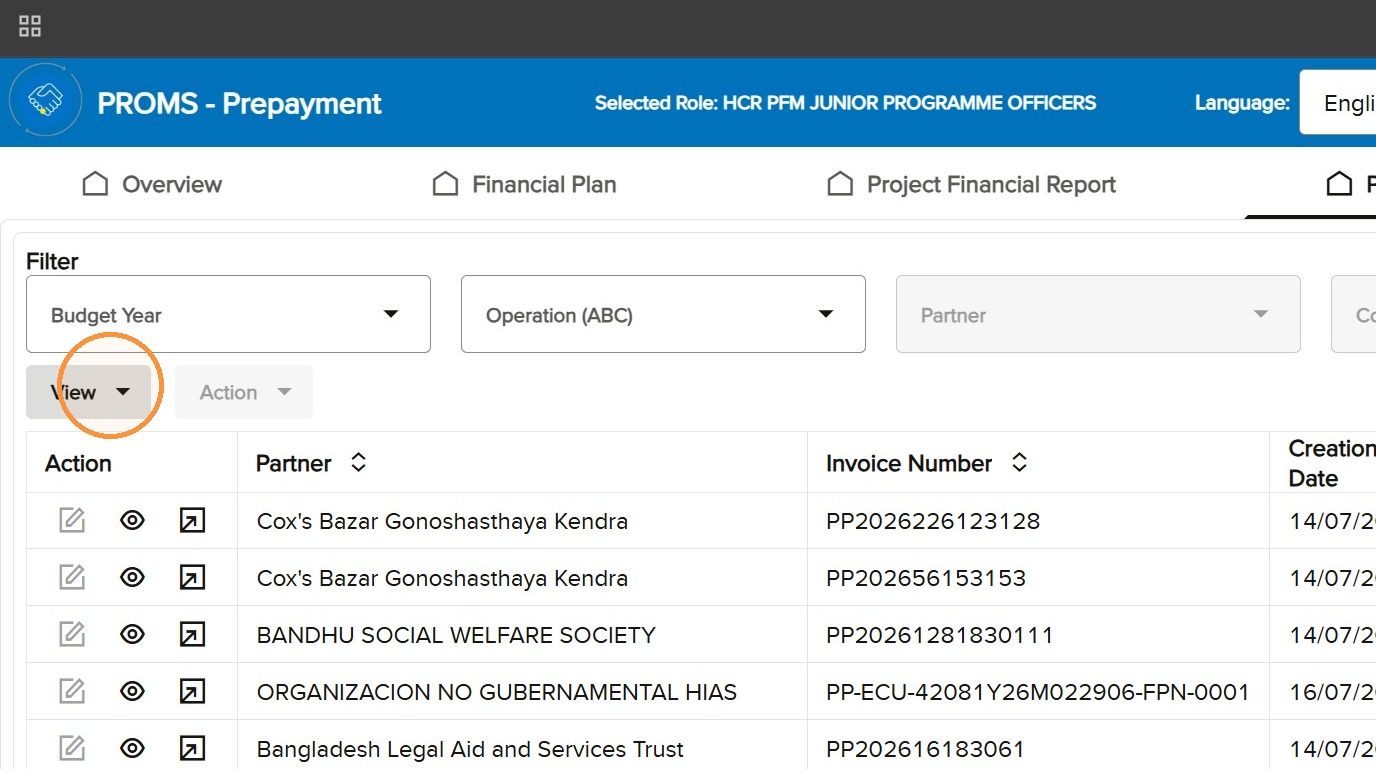
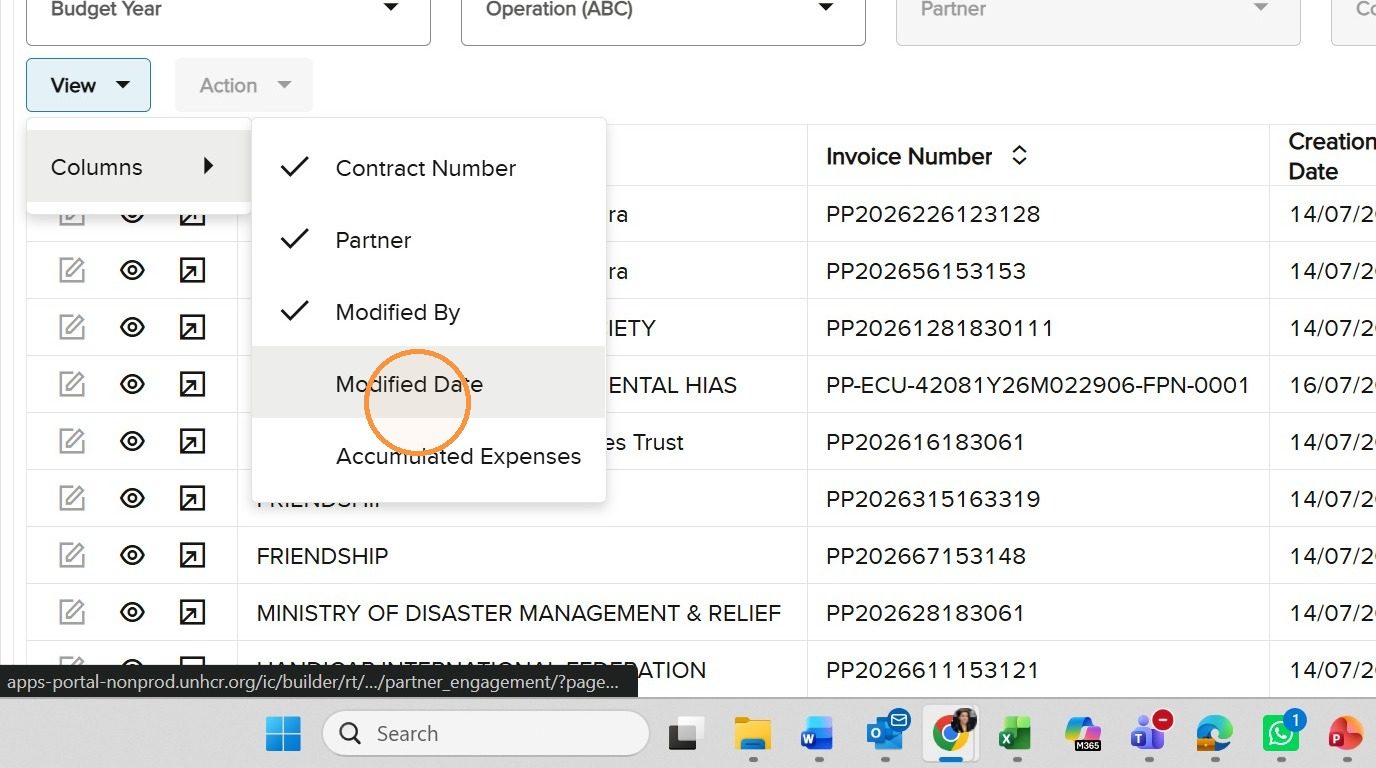
Open View to choose which prepayment columns appear. The selected fields also determine the content of the exported Excel file. Use the Export control above the table when the result set is ready.
Open View on the Prepayment page.
Select the Prepayment columns required for review or export.
Use the Action menu and recognise icons
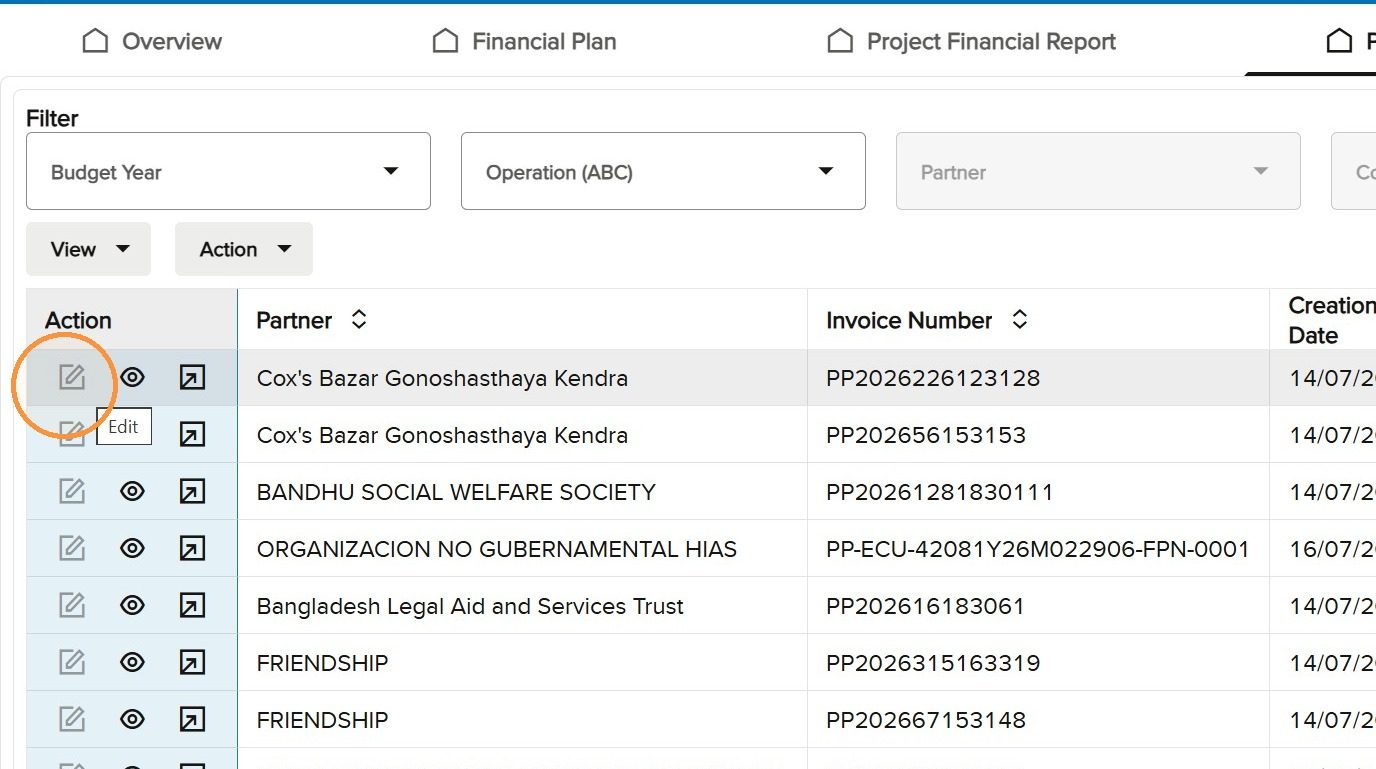
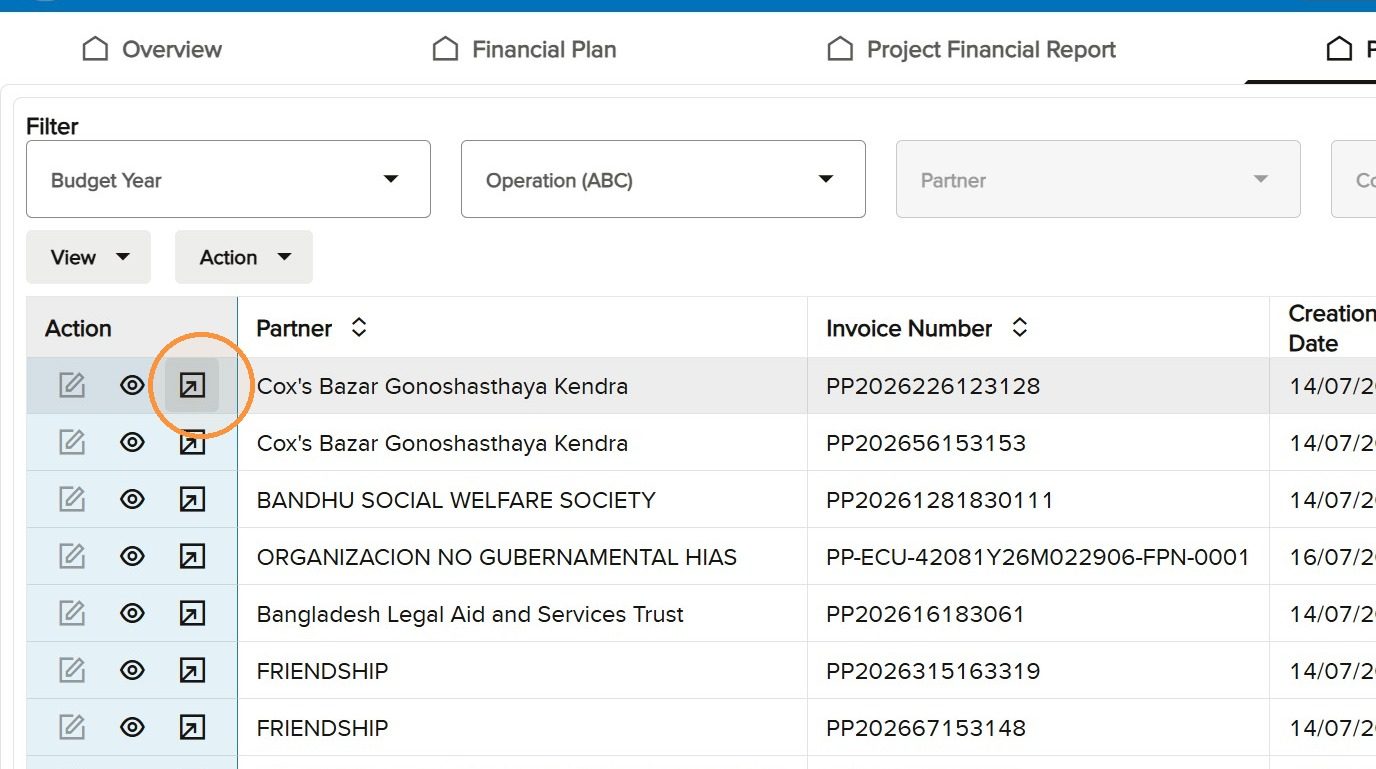
The Prepayment Action column includes Edit, View and Invoice Details. Edit is active only when the current role and status permit changes. View is available for read-only access. Invoice Details opens the information associated with the prepayment and its Cloud ERP processing.
Locate the Prepayment Action column.
Recognise the Edit and View icons.
Open invoice details
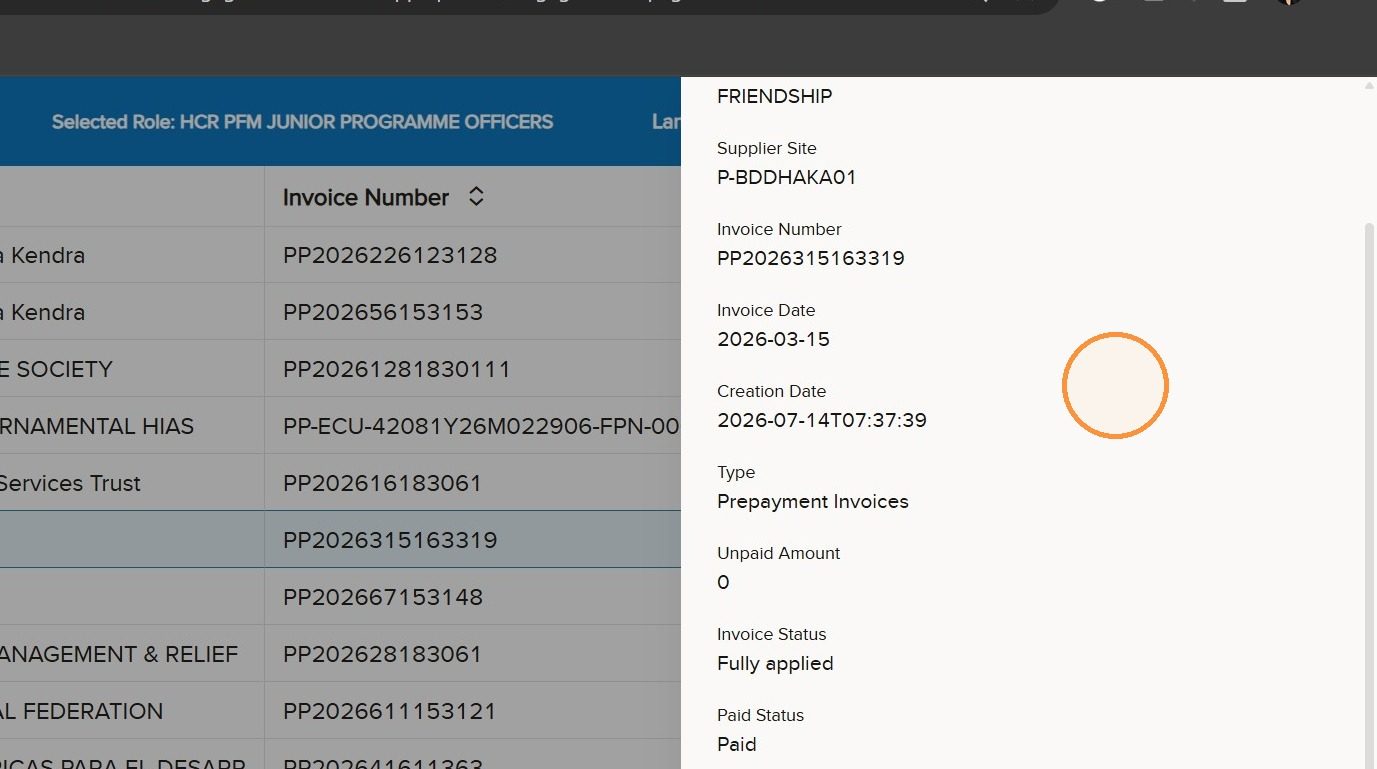
Select the Invoice Details icon for the required record. A panel opens on the right side of the screen and brings together the prepayment information, including available Cloud ERP details. Review the panel and close it when finished.
Select the Invoice Details icon for the required prepayment.
Review the complete prepayment and invoice information.
Prepayment search page columns
Column
What the column shows
Action
Edit, View and Invoice Details controls available for the record.
Invoice Number
The invoice number associated with the prepayment.
Creation Date
The date on which the prepayment record was created.
Prepayment Amount
The value of the prepayment.
Prepayment Status
The current processing status of the prepayment.
Financial Plan Number
The Financial Plan linked to the prepayment.
Sub Status
Additional information when a processing or business issue exists.
Contract Number
The contract number for the partnership agreement.
Modified By
The user who most recently modified the prepayment.
Modified Date
The date on which the prepayment was most recently modified.
Accumulated Expenses
The accumulated expenses linked to the relevant Financial Plan.
Export the full table
Select Export to create an Excel file containing the records returned by the current filters and the columns selected through View. The Prepayment page provides Export but not the single-record Print function.
Navigate pages and change visible rows
Use the controls at the lower left to move between result pages. Use the rows-per-page selector at the lower right to change the number of records visible on the page.
10
Conclusion and support
Key reminders and help routes
Before working
Confirm the Selected Role.
Review Security Context.
Check notifications and recent changes.
When searching
Leave filters blank for all accessible records.
Select Budget Year before Contract Number.
Select Operation before Partner.
When using actions
Dark icons are available; grey icons are not.
Print applies to one selected FPN or PFR.
Export applies to the filtered table and visible columns.
If access, role selection, security context or a locked document prevents you from continuing, contact the designated PROMS focal point or PROMS App Administrator. Provide the page name, active role, operation, record number and the action you were attempting. Do not include passwords or authentication codes in a support request.
Final reminderYour active role and security context determine both the records you can see and the actions you can perform.